Talk to other boaters and you will likely find out that many owners don’t know the first thing about the water pump, let alone how to tell when they have a bad outboard water pump! Yet, this vital component must be serviced regularly to maintain the longevity of your outboard.
A bad outboard water pump will produce lower water pressure than normal. The outboard can stop pumping water out the tell-tale, begin to overheat, restrict the available RPM allowed, and cause significant damage if not corrected.
Thankfully, you can service the water pump to ensure it runs smoothly. In many cases, it’s just a matter of changing out the water pump impeller!
What is an Outboard Water Pump?
Outboard water pumps aren’t complicated. It is located just above the lower gear case assembly, making it easy to service.
Inside the pump housing, there is a rubber impeller that is keyed to the driveshaft.
As water enters into the lower gear case via the inlets on the side of the lower unit, the driveshaft will turn the pump impeller.
This pump then draws water from the intakes into the housing. Impeller blades, or vanes, touch the liner as the driveshaft rotates.
As the engine starts to rev up, these blades back away from the liner. The pump sends out water from the top of the housing with a brass tube.
This travels up through the engine’s power head, ensuring it circulates into the cooling passages of the engine.
How Do I Know if My Boat Water Pump is Bad?
The most obvious way to tell if the outboard water pump is failing is to watch for the engine to overheat. However, this problem can be caused by a number of issues, which is why it’s vital to test for a bad outboard water pump.
How Do You Test an Outboard Water Pump?
On many outboards, you can simply put on the muffs and start the engine. You should see a steady stream of water coming out of the holes on the top of the engine.
However, some brands do pump out a stream, but it might not look steady. While this can be alarming, it is perfectly normal for those models. It just depends on what type of outboard you have.
It is also important to remember that while on the muffs. Some of those models will not produce enough vacuum to push water out of the tell tale or the holes on the top of the lower unit.
That is because there is less water pressure from the garden hose and the muffs. Than there is when the engine is in the water and has the back pressure of the water where the lower unit is fully submerged in the water. Forcing the impeller to be under the water.
You can also look on your gauge, depending on the type of gauges you have on your boat. A lot of newer models will show you the water pressure being produced right there on your gauge!
Most impellers at idle will produce anywhere from 1-3 PSI at idle. Then up to 20-25 PSI at wide-open-throttle! This does change depending on the age, RPM, and model of outboard and impeller though.
If you are unsure how the outboard water pump is functioning, it doesn’t hurt to change the impeller. It should be changed often anyway and is the leading cause of water pump failure.
Why is My Outboard Not Pumping Water?
Outboard motors don’t need a complicated system to push water through the engine’s cooling passages. The simple design ensures that the temperature is always maintained and the engine doesn’t overheat.
If you notice that water has stopped circulating normally, you want to take action immediately before permanent damage occurs.
Here are four steps to take now.
Step #1: Check the Water Pump Impeller
Most circulation issues and overheating engines are caused by a faulty water pump impeller. This small, round disc has spinning blades that move water through the unit.
If it breaks, it stops supplying water to the engine, which results in overheating.
Because this part is inexpensive and easy to install, it’s best to keep a spare handy. In fact, it should be changed often as part of your outboard boat maintenance procedures.
Step #2: Evaluate the Water Intake
With the boat engine off, inspect for any debris, such as trash or weeds, which could be blocking water intake.
If you see a foreign object present, remove it now. Then, restart the engine to see if the problem is resolved.
Step #3: Inspect the Water Output
With the majority of outboard motors, there is a water output. This small tube can easily become blocked.
When this occurs, the water flow is disrupted, causing trouble to the engine.
Take a thin piece of wire and run it through the output. Wiggle it around to dislodge any debris that might be inside.
Your water flow should appear steady in most outboards. You also want the water coming out to be warm, but not excessively hot.
Step #4: Check the Thermostat
While this isn’t a common issue, it is something else to check. Obviously, if the engine isn’t getting warm enough to maintain temperature, you want to replace the outboard thermostat immediately.
If you don’t, you face ruining the power head altogether.
What Happens When Impeller Goes Bad?

In many cases, the water pump failure is actually a result of a bad impeller. What is the impeller?
The impellers pump cold water into the engine, so it cools down.
The impeller is a series of rubber vanes that are molded around a hub. These flexible vane tips wear out for several reasons, none of which can be prevented.
Additionally, if the outboard motor sits unused, the impeller can become brittle and stiff, rendering it unusable.
What’s worse is when the impeller is run dry. Water is needed to lubricate the impeller. In these conditions, it can go bad in just a couple of seconds.
Catching trouble with the impeller early is your best bet. Otherwise, there could be catastrophic damage to the engine as it overheats.
Here are a few signs to watch for:
Overheating Outboard
If the motor temperature starts to climb, you should be concerned. Your problem could be due to a bad impeller.
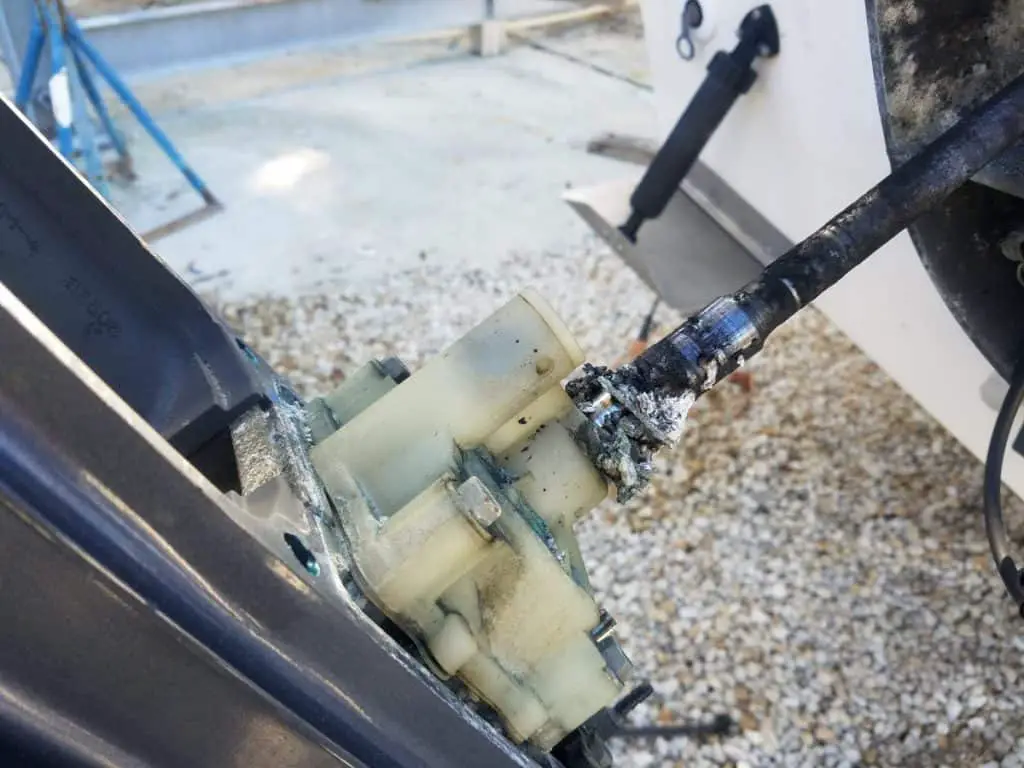
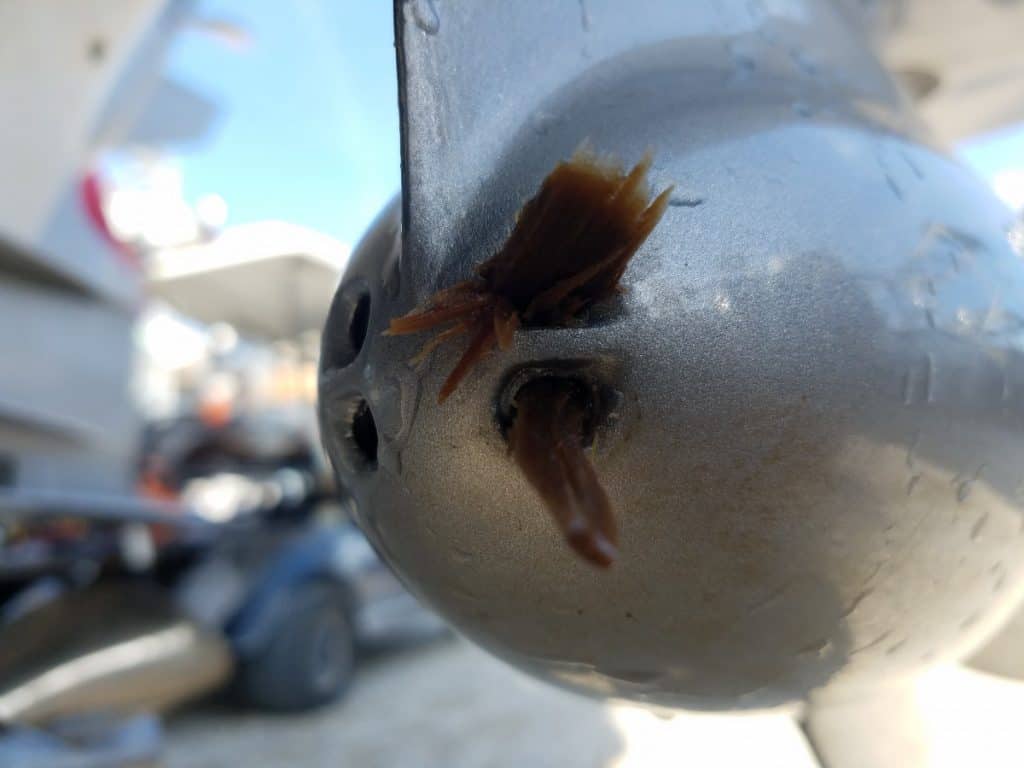
Additionally, you want to examine the cooling water outlet, which is located on the bottom rear of your motor’s top cowling. If you have had the boat in storage, it’s likely that pests have taken up home in that area.
Reduced Water Stream from Cooling Water Outlet or Tell Tale
When the stream of water is reduced, there could be a blockage. Insert a thin wire into the outlet to confirm your suspicion.
If you have had the boat out previously without problems, you might have a damaged pump housing instead. Look for a hole in your water pump.
Plus, if the pressure has simply dropped, you might find that a damaged or worn impeller is the source of trouble.
Lack of Service for Impeller
If you haven’t changed out the impeller recently, you might want to replace it now. Inspect the water pump as you make your seasonal preparations.
Check the manufacturer’s recommendations to find out how often to change your impeller. Some suggest yearly, while others allow up to three years.
Whatever the time frame is, don’t neglect this vital maintenance step!
How Often Should You Change Your Outboard Water Pump?
It really depends on how you run it and what the manufacturer suggests. You shouldn’t have to change the water pump itself, but the impeller should be a top concern.
For example, if you run skinny and tend to pump a lot of sand, you will need to change the impeller more frequently than other boaters.
The majority of manufacturers and mechanics suggest that you shouldn’t go more than three years with the current impeller intact. Otherwise, the bolts on the lower unit could cease up, leading to more wear to the impeller.
Others suggest it’s wise to change the impeller every season, just to be safe.
How Much Does it Cost to Replace an Outboard Water Pump?
You can purchase most water pump repair kits for under $100, which include the impeller. If you can install this yourself, you would save a lot of money.
Otherwise, a shop might charge you an hour or two, which could result in an hourly rate from $100 to $350, depending on where you take it.
If you choose to perform your own outboard water pump service, here are the steps to follow.
Step #1: Drain the Oil
Begin by draining the oil from the gearbox. Use a large screwdriver to unscrew the drain plug. Make sure you have a pan underneath to catch the oil.
Unscrew the upper oil-level plug as well, to allow air into the gearbox.
Step #2: Remove Nuts
Remove all of the nuts holding the lower unit in place. Most outboards have four to seven nuts or bolts. If your socket doesn’t fit, use a ring wrench instead.
If the lower unit is free, remove it. Otherwise, you might need to give it a few taps with a soft mallet. Just don’t hit the flange cavitation plates or they will break.
Step #3: Slide off the Seal
Once the bottom is clear, it’s time to start on the pump. Slide off the seal, which is sitting on top of the pump housing.
Step #4: Remove Pump Housing Bolts
Use a ring wrench to unscrew the bolts holding the pump housing in place. If the pump hasn’t been serviced recently, you might need the help of an impact wrench instead.
Whatever you do, don’t take the bolts off with an open-ended wrench. This is because you can put too much force on the bolt head and it’s a lot easier to snap the head off and then you will have a whole other problem to deal with!
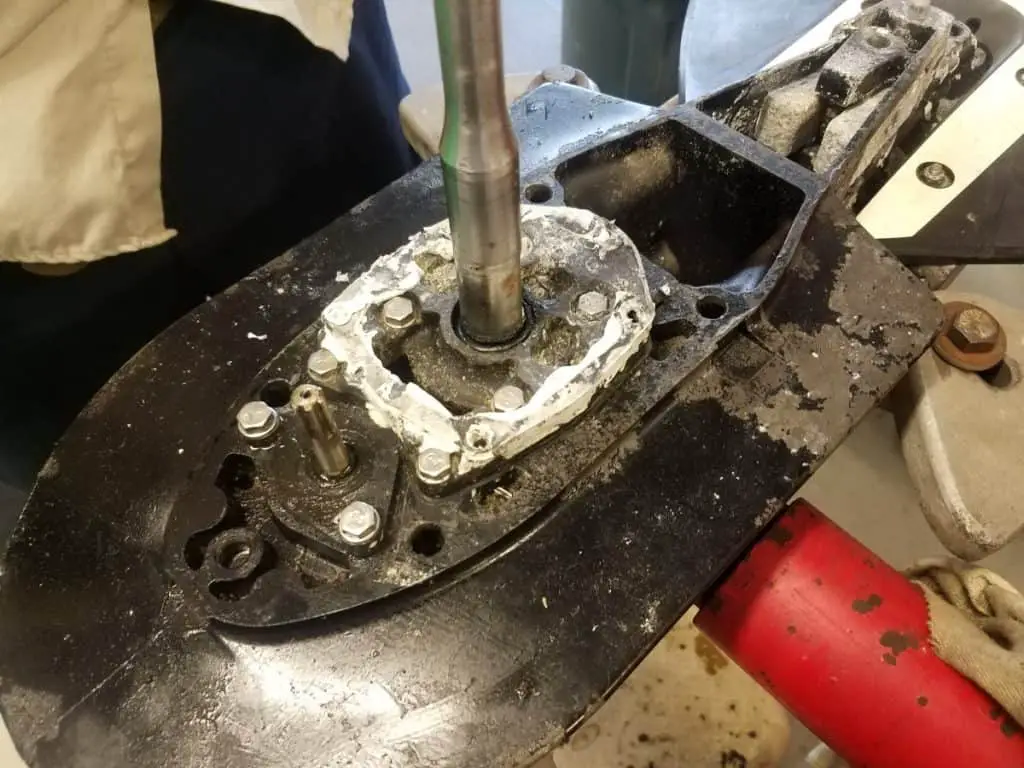
Separate the housing. Slide it up the shaft. Make sure you remove the plate.
Step #5: Inspect the Impeller
All of the vanes on the impeller should be intact and straight. If they require replacement, now is the time.
Step #6: Clean Surfaces
Take time to clean off all of the mating surfaces. This practice ensures there won’t be any leaks.
If there are large bits of sealant or gasket that need to be removed, use a sharp razor blade.
For smaller contaminants, fine emery paper should do the trick.
When you are finished, wipe it down with a clean rag. Everything should look bright and new.
Next, you can wipe the pump housing interior. There should be no gouges or score marks.
This is a good time now with the oil out and the seals exposed. To perform a lower unit pressure test, to see if any of the seals are leaking before reassembling everything!
Step #7: Reassemble with New Parts
When you purchase a water pump repair kit, you get a new impeller, as well as the seals, O-rings and gaskets.
Once everything is cleaned, use the new parts for reassembly.
Use some of the gasket sealing compound and lower your gasket into place. Make sure every hole is properly lined up.
You also want to install a new key. This sits in the flat part on the shaft.
If you are putting on a new impeller, line up the key way in the hub with the previously used key.
You can also use some glycerin or dish washing liquid to get the pump cover on easier. This also provides some lubrication for the first few seconds before the water gets into the pump. Never use silicone.
Step #8: Reassemble
As you slide the housing down, ease it over the vanes while twisting the shaft clockwise. This motion allows the blades to bend while sitting the body of the pump fully down on its base plate gasket.
Reinstall all of the bolts and tighten them until each is snug. Slide the new seal down until it is resting against the pump housing.
The kit should also include a setting tool, which you will use to push down on the top of the seal. Not only will this spread it out, but it makes sure there isn’t too much compression.
Put a small amount of engine spline coupling grease to the top of the drive shaft. Add a little more grease to the gear-shift coupler.
Step #9: Refill Gearbox
Replace the screw plugs and reinstall the lower unit. Make sure you don’t over tighten any of the nuts.
Use the right oil to fill the gearbox.
As with any service, you want to test the parts once the job is complete. Run your outboard, carefully monitoring the stream of water. Everything should be running smoothly now.
Here are a couple of videos to show some of these process’s!
Check Us Out!
If you are noticing signs of a bad outboard water pump, go through our article to troubleshoot the issues. We want to make sure everything is running well with your outboard, which is why we provide lots of tips and tricks on our YouTube channel.
You can also find blog articles that address a variety of needs, from maintenance to repair. Make the most out of your time boating with our help.