0:00
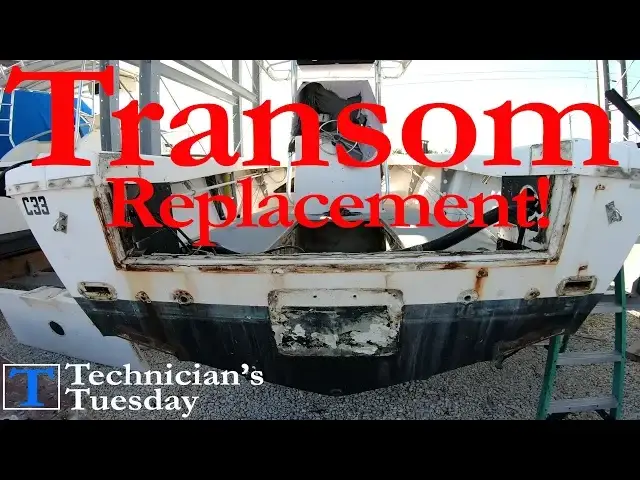
It's Technicians Tuesday and today we will be clearing off this transom to prepare it to be cut out and replaced
0:09
What's up guys? We've got a big day ahead of us today so let's get started
0:13
First things first we've got to get rid of all this trash that's left behind from finally getting that fuel tank out
0:19
We'll make it easier and just pull the dumpster right up to the boat and sweep it all out
0:23
Once we've got the deck clear again, it looks like a boat again. We'll go ahead and get rid of this broken access port here to the bilge and then take off this access panel and this piece here on the bottom so we can reach the bolts to the swim platform
0:39
Now whoever did the Transom actually used some starboard pieces here on the top of the wood, so we'll take these pieces off and save them
0:47
It's always nice to have some scrap pieces of starboard laying around when you are doing projects like this and we'll probably use some of it as spacers for the brackets that will be on our new feet
0:57
fuel tank. With the starboard off, we can locate the screws holding the rotten plywood on
1:02
and then we can get rid of the first panel of trash. Then we can take out the screws holding this
1:08
long piece of starboard on, because we'll want to save this piece as well, just without the rotting
1:13
wood attached to it. Next up, we'll get rid of this side panel here by taking the steering
1:22
hoses out of the panel, and then just ripping the panel off of the wall, and then taking
1:27
the rub rail off of it and throwing it away. In order to get the other side off, we'll go ahead and derog the engine next so we can pull
1:36
the rigging tube through the pan. HPDIs aren't too bad to derig
1:41
We've already got the power cable disconnected and we'll have to pull off the caling gasket
1:45
here and then take out these three 10 millimeter bolts holding the cover and the grommet
1:49
bracket on. With the cover off, we can see the high-performance. mechanical control cables. But then we'll pull that grommet bracket off and
2:03
disconnect the main engine harness from the boat harness. It looks like this
2:11
clip has been broken and zip tied which isn uncommon on these engines but we cut the tie so we can pop the cables out when we get there This bracket here holds the oil tank harness with two other harnesses that we have to disconnect
2:28
After getting those disconnected and out of the way, we can easily reach in here and take out the pin for the throttle cable
2:35
and then pry the cable out of the bracket holding it in. Then remove the cable
2:42
We'll do the same thing for the shift cable and pull the pin, then pull the cable out
2:48
This cable was so rusted that it broke right off of the cable end, so we had to fish that
2:52
out from the pan. Now we just have to disconnect the ground cable, and if you pull this rigging clamp off, we can
3:01
slide the rigging tube back and find the Pito water hose connection for the speedometer
3:06
and disconnect that. I like to put all the rigging grommets and stuff back on the engine so it doesn't get lost
3:16
but we are left with just disconnecting the fuel and oil hoses here from the port side of the engine
3:22
Both of these hoses have a coupler connecting them. This is where we can disconnect the fuel line and then just pull the oil hose off of the oil tank
3:30
and we'll take that off the coupler once we get the hose pulled out from the engine
3:37
Which means we are completely derrigged and we can throw the rigging up into the boat
3:41
and then get the steering hoses off of the steering cylinder that are on the engine
3:49
It's important to note that when you are disconnecting steering hoses, it's best to use two wrenches that are usually a 5 eighths inch and either a 13-16th or a 3 quarter inch
4:00
That way we can hold the hose with the 5-8s inch and crack the fitting with the other one
4:05
This way we can avoid damaging the hose by twisting it and putting a hole in it if it is an older hose
4:11
Using some rags so we don't make a mess, we'll make sure we have a coupler ready and
4:17
we'll slide this old rigging flange off and hook the two cables together with the
4:21
coupler to keep us from leaking hydraulic fluid everywhere and then having to walk through it
4:28
With the hoses off we can take this rigging tube and get it out of this side piece here The battery on the camera died here but we just took that last side piece off and then threw it away Move the dumpster out of the way and then got a stand to hang the engine on
4:42
once we pull it off the bracket. These swim platforms are only held on by four bolts
4:50
and then they come off really easily. We actually have a video on installing one of these platforms
4:55
if you are interested in that. We'll put a link in the description to it
4:58
but once we get that off, We took off the two deck drain covers and then followed the wire for the trim tab actuator and just cut it so we could pull the wire out of the transom because we are going to want to save these actuators and trim tab planes to use them again once the transom's done
5:16
To get the actuator off, you just push the pin through and then we can pull the wire out of the transom and then remove the screws holding the trim tab plane on
5:25
It's best to take a knife and clean out the bottom paint from the screw heads so we can get a good
5:30
clean bite on the screw with our impact. But once we have the screws cleaned out, we can take
5:36
them out and the plane will just fall right off. Make sure not to forget the actuator bracket piece
5:41
and stick that onto the actuator so it doesn't get lost. We'll just repeat that same exact process
5:47
for the other side of the transom and get all of the parts off and we'll be ready to pull the engine
5:52
and bracket. It's a pretty clear sign that the transom is rotting when you take the screws out
5:57
of stuff and water comes pouring out of the screw holes. This transducer here will never be used again, so it goes straight into the trash can
6:09
which basically leaves us with the engine and the engine bracket. We'll hook up the lifting chain to the lifting ice on top of the engine, then just zip
6:17
the four mounting bolts out of the engine and move it over to the engine stand that we got earlier
6:30
we can tighten the engine up to the stand and then move it out of the way so that we can get this engine bracket off the transom This bracket is held on by 10 bolts that are through bolted through the transom
7:02
It's just a matter of pulling the bolts out and we are ready to pull the bracket off
7:06
I like to pull the bottom bolts out first and then finish with the top bolts
7:18
We'll move the forklift under the bracket and lift the bracket and boat up to try and break
7:26
the sealant free. You want to leave one of the bolts on with the nut just on the end of the bolt to keep the bracket
7:31
from falling, but this way we can take a pry bar and pop the bracket free from the tranceum
7:43
We'll lower the forklift down but leave it there to help hold the bracket and then just pry out
7:48
the other side and then remove the last bolt holding the bracket on
7:57
With that bolt out, we can slide the bracket back and move it out of the way
8:02
Before finishing the day out, we'll go ahead and remove the rub rails just around the
8:06
sides of the boat. This way we can fold them back and out of the way for when we go to cut the tranceum out
8:15
Which leaves us with a clean transom with the exception of the hull idea
8:18
which is extremely important and we want to take that off and save it because we'll need to put that back on once we've finished the transom
8:27
Then the lifting hooks and the garber drain plug. And that's it. We've come to the end of this week's Technicians Tuesday and if you're excited to see the actual transom cut out of the boat
8:40
then go ahead and give the video a thumbs up. Then if you haven't yet, make sure you're subscribed to the channel so you don't miss out as we continue to revive
8:48
this beautiful center concert. You can always visit us on our website
8:52
at born againboating.com. And as always, thank you for hanging out with us today
8:58
Enjoy your Tuesday night and we'll see you next week