A common problem that we see a lot of, with Two Stroke Outboard Motors is that for some reason they seem to die when you put them into gear! So …
Why Does My Outboard Motor Die When I Put It In Gear? Outboard engine RPM’s are lower when they are in gear. They can die when put in gear because one or more cylinders may have a problem and are not firing. Once in gear the RPM’s are so low that the engine dies.
Here are the best and quickest technical troubleshooting tips and fixes that you can try in order to resolve this problem.
Why This Happens Mainly To Two Strokes?
We mainly see this issue on two stroke outboards. The reason is pretty quick and simple.
With the exceptions of Mercury Optimax’s, Yamaha OX-66, HPDI’s, and Evinrude FICHT and E-TEC’s, most two strokes are not computerized. This issue is still common even on these engines though. That is because these engines are burning oil.
Adding oil to the fuel and air mixture that is burned in a combustible engine, makes it that much more of an issue when there is a problem with one of the cylinders. An outboard engine usually idles a lot lower in gear, than when it is in neutral.
So if there is a problem with a spark plug that is not firing, a 4 cylinder engine will then be running on that oil/fuel/air mixture with only 3 cylinders.
The “in gear” RPM’s should be around 700-800. Without that other cylinder they can drop to 400-500 RPM’s. Which is so low that the motor can not continue running and will just die!
What About Four Strokes?
There are certain instances where this can happen on four strokes as well. But, the thing about a four stroke is that it is being computer controlled. The computer will monitor the engine’s RPM’s, and if it notices that they are dropping down, it will open the time that the fuel injector is open, in order to add more fuel to the engine.
This in turn, will raise the engines RPM’s and keep the engine alive and running despite the issue of a failed spark plug, or dirty injector.
Even though 1 or 2 cylinder’s are not firing correctly, the engine can bring those RPM’s up and keep it from dying.
It is most common for four strokes to have a shift cut out switch. Or a shift position switch. This will tell the engine what gear it is in and is mainly for safety purposes. There have been instances where these sensors have failed and given a “cuts out when put in gear” scenario.
For the purposes of this article, we’ll stick to the two strokes and cover the more common issues with them.
Why Does The Engine Cut Out When Shifting?
Most outboard engines that have been built in the past 20 years have what is called a shift cut out switch. Or a programming in them that is designed to lower the RPM’s when the engine is shifted.
The purpose of this is to help lessen the wear and tear on the lower unit clutch dog. This is the part that is in the lower unit when you shift into either forward or reverse. There is a little gear attached to the propshaft that will slide either forward or reverse and interlock with the gear that will spin the propeller either forward or reverse.
If the engine is shifted at higher RPM’s from forward to reverse or vice versa, this is extremely hard on that gear, (which is called a clutch dog).
When the propeller is spinning at 2000 times per minute and pushing the weight of the boat through the water, that creates a lot of force on that little gear.
Then to take that gear, with the weight and direction of the boat at that same speed and completely stop it, to begin spinning it in the opposite direction, that will only take so much before it just gives up or explodes!
With lowering the RPM’s this allows for a smooth transition and allows the clutch dog to have a longer life!
Make Sure the Engine is Viable
Performing a compression test is usually the first thing that we test in the field before we start troubleshooting an engine.
Doing this will confirm that the engine is not getting ready to blow up, or has a bad cylinder which is causing the issue.
Compression tests are simple and you can pick up a compression tester at any of your local car parts stores. Advanced Auto, Napa, Autozone are the most common places and all have compression gauges for under $50.
Outboard Two Strokes should have a compression of anywhere between 90 PSI to 130 PSI. Anywhere in between these numbers, as long as they are not way off between each other is good to go! If one cylinder is at 90 and the others are at 130, that could be a problem that needs addressed first!
Four stroke outboards, on the other hand, can range from 160 PSI to 220 PSI. This depends on what engine and whether or not the throttle plates are opened up or not. The same rules apply with the difference between the cylinders.
What Is The First Thing To Test?
Each individual cylinder should be tested first, to see if the engine is not firing on all cylinders, which causes the motor to die when shifted.
You can easily do this by getting something that is not straight metal (try these spark plug wire pliers). Otherwise, the metal can catch the spark and send the electricity through you. Once you have the proper tool, with the engine idling, carefully remove each spark plug wire individually.
Listening to the engine and watching it, as you remove a plug wire, you should notice a difference in the engine. Like a sound and a little shake. Then reinstall that spark plug wire and move to the next one.
Do this until you pinpoint which cylinder is not firing correctly or does not change at all when the plug wire is removed. Then hopefully this will get you to the source of the problem, the ill working cylinder.
Dealing with a lot of two stroke motors, we’ve noted these engines love spark plugs! Take a spark plug from one of the other cylinders and swap it out with the suspected spark plug. Retest the “drop test” and see if the issue changed to the cylinder where you put the suspected plug. If it did, you need some new plugs! If it didn’t, let’s keep going!
Second Thing To Test Is To Decide Fuel or Electrical
Once we’ve ruled out it being the spark plug, it’s time we make an educated decision on where to go. Fuel or electrical! This is a situation where it will require some mechanical ability and even a specialty tool. We want to preform a Spark & Compression Test!
Now, a spark test needs to be performed. For this we will need a spark tester and also a remote starter switch.
Using a spark tester is the best and safest way to perform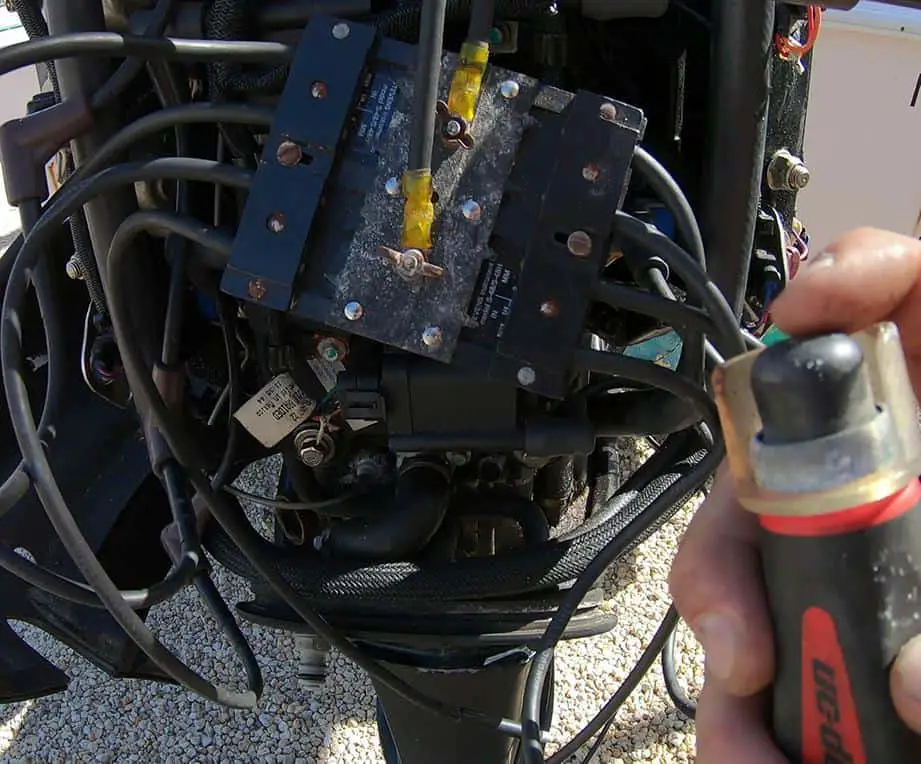 this test. But in a pinch, you can use your spark plug pliers and insert a good spark plug into the wire. Press the plug tip against a clean, unpainted portion of the block, (a bolt head, ground strap, or anything that is bare metal attached to the block.)
Then using the starter switch, crank the engine over and see if it sparks! If all of the cylinders are sparking, then we know that the issue is most likely not electrical.
In certain instances, it can be related to timing.
But messing with an engine’s timing is different and specific to each individual engine model and manufacturer.
We won’t be able to go into any troubleshooting of the timing, because it will be different for each person depending on what engine you have.
If there is a cylinder that is missing spark, then there will need to be further testing of the ignition system. A quick test would be to change the spark plug wire that doesn’t spark, to one that did spark.
If the no spark follows to the one that did, then you are most likely looking at a bad ignition coil. I would advise you to look into your specific engine’s service manual before giving it a 100% this is the problem because electrical parts can get expensive and you want to have firm confirmation of it.
However, this should get you in the right direction to getting it fixed!
If It Isn’t Electrical, Let’s Check Fuel
Once we have ruled out the electrical aspect, then we can move on and look at the fuel portion of the engine. The best way to begin this process is back at the spark plugs.
Before removing the plugs to perform your first tests remember: After we performed the drop test we figured out that there were one or two specific cylinders that were not firing correctly.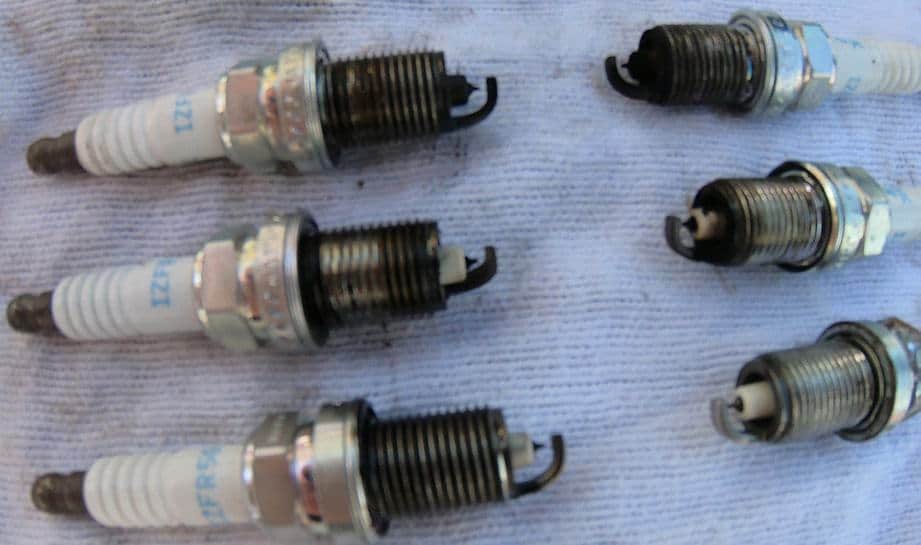 Be paying attention to the spark plugs as you pull them out. Remember exactly what plug came from which cylinder.
Looking at the plugs can tell us a lot about what is going on. If the plug is completely white and clean, this is what is called “whitewashed.”
Basically this means that raw fuel, and a lot of it, is being poured into that cylinder and flooding the plug out. Meaning that there is so much fuel in the cylinder that the spark plug is not able to light the fuel on fire because there is not enough air or basically, way too much fuel.
It is the proper mixture of fuel and air that makes it explosive. If there is too much of either, then there can’t be an explosion. Fire needs air to breathe and continue burning. It requires a specific ratio of air to fuel mixture for it to spark.
There is a technical term for this called the “stoi-chi-o-met-ric ratio.” The stoichiometric ratio is 14.7 to 1. Which is 14.7 grams of air to 1 gram of fuel. This is the perfect ratio for a gasoline engine.
White Washed Plugs
Without getting into all that, a whitewashed plug means that there is way too much fuel getting to that cylinder. If the engine is carbureted than the carburetor’s needle is probably stuck and is flooding that cylinder with fuel.
Which in this case, that carburetor needs to be removed and cleaned. Make sure to check the needle closely to see if it is worn down. Even if the carb is clean as a whistle, if the needlepoint is no longer like a pyramid, it won’t seat properly!
Also, make sure you properly calibrate the float. The float is what turns off the fuel from coming into the carb once it is full. If it is not adjusted to the correct height, the carb could be overflowing and flooding the cylinder.
On engines that are fuel-injected, this is a sign that the injector is stuck open. If an injector sticks open then there will be fuel flowing into that cylinder almost all of the time, completely flooding it out and restricting the cylinder from firing!
Black Plugs
If the plug is completely black. This is carbon build-up. Which occurs most commonly when there is a rich fuel mixture in the cylinder.
Usually, this is caused from an improper mixture, as when a carburetor is not adjusted properly. On the side of a carburetor, there is an idle air adjustment screw. A lot of times as plugs go bad and things get worn out, instead of correcting the issue, people will just turn the adjustment screw until the engine idles out fine.
This works for the time being. But it doesn’t fix the root cause and eventually causes other issues.
Remove, clean, and properly adjust the carb, in order to fix this problem. Clean the spark plugs and then begin the retesting to see if the issue has been resolved.
In the case of a fuel-injected engine, the injector could be partially stuck open. In this case the injectors will need to be cleaned or replaced. Injectors can be cleaned. But, need to be cleaned by a professional. Due to it being a dangerous and hazardous task!
Chalky Brown Plugs
Chalky brown plugs are usually a good thing! This indicates a decently good burn inside the cylinder. Indicating that the fuel-air mixture is correct! However, it can also mean worn-out plugs.
If all of the plugs are the same and are this color, we can try testing the plugs and cleaning them. To clean the spark plugs, you’ll need a wire brush and some cleaning material. Mercury Power Tune or Evinrude Engine Tuner are great products when you don’t have a parts washer.
Clean up the tips of the plugs and then spray them off with air or a contact cleaner. Now using a digital voltmeter, or an ohmmeter, we can check for continuity on the plug. Ohming out the plugs are fairly simple.
Just check from the threads of the spark plug to the actual metal tip that is on the inside of the plug. Not the metal that is hanging over the tip, but the actual tip itself. This should not have continuity and if it does, it will be a certain amount, like 4K ohms or so.
Make sure that none of the plugs are grounded out. If they are too chalky, or won’t clean up, replace them. No need in going hog wild and tearing the engine apart to find out that it was a weak plug.
In Conclusion
Performing these quick tests, should get you in the right direction to fixing your motor, stopping it from cutting out and dying when it is put into gear. Most of the time this is all caused by either those spark plugs, a bad ignition coil, or a dirty carburetor.
With an issue like this, these are all your basic fundamental tests. Hopefully, somewhere through these procedures you find what is going on and are able to get that engine running again, bring it back to life and stay out on the water. If there is anything we can help with or a question you’d like to ask. Just ask us in the comment section below. Then we invite you to
Check Us Out On YouTube!
Where we create and cover all kinds of outboard and boating how to’s, service, troubleshooting, and DIY projects! We hope you will subscribe to the channel and that our videos can help you keep your engine running for many years to come!
If you’ve got any questions or comments, let us know by subscribing to our YouTube Channel!
And if you would like to support us to continue bringing you great content, please click the link below to Amazon where we get a commission from anything you are already going to buy!
And you can also donate by clicking the donate button here or on the right hand of the screen!
It really helps us out and we thank you so much for your support!
Thanks for reading and we look forward to reading your responses and comments.