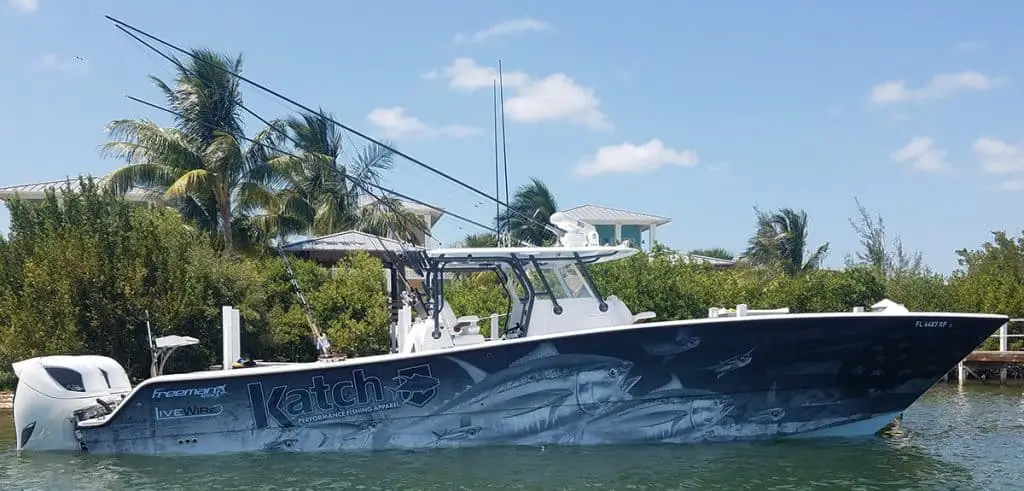
If you aren’t used to being around larger fishing boats. Or even offshore fishing boats, then you are probably wondering what the poles on top of the boat are. Why they are there and what are they used for?
What Are Boat Outriggers Used For & How To Use Them? Boat outriggers are poles made from either aluminum, fiberglass, or kevlar. They are used in a type of offshore fishing called trolling. They allow the user to have more fishing lines with bait on them to drag behind the boat. Outriggers help keep the lines apart from each other in order to keep them from getting tangled up.
This article will teach you everything that you need to know about your boat’s outriggers and the most effective way for you to use them!
What Are Outriggers Made Out Of?
Outriggers need to be sturdy and strong to securely hold your fishing lines while trolling for fish.
At the same time, they have to be lightweight as well. So that they don’t sag under their own weight or the tension of the lines.
Additionally, you use outriggers on a boat offshore, so it goes without saying that their construction material needs to be resistant to corrosion due to the saltwater.
This is why manufacturers often use durable, strong, and lightweight materials to construct outriggers. Aluminum, Fiberglass, Carbon-fiber, and Kevlar are some of the more popular materials of choice for manufacturers who produce fishing outriggers for boats.
Aluminum is the dominant choice for anglers because it offers a very cost-effective solution to trolling. However, when the length of the pole exceeds about 18 feet, the stress on the pole increases exponentially while trolling.
Aluminum is too flimsy and not a viable option at this point. This is why you will often find outriggers longer than 18 feet constructed from heavy-duty materials, such as carbon-fiber or Kevlar.
Different Styles Of Outriggers
There are many different styles of outriggers, and each of them has its own purpose.
Telescoping Vs. Fixed Length Outriggers
The simplest type of outrigger employs a fixed-length style comprising of a single solid pole. When using these outriggers, you have to be careful of bridges and boat slip clearances.
Otherwise, you can snap your outriggers and damage your boat going under a low-clearance bridge. You can find plenty of boating fails videos on the internet that showcase this exact mistake of not accounting for the length of your outriggers, leading to disastrous results.
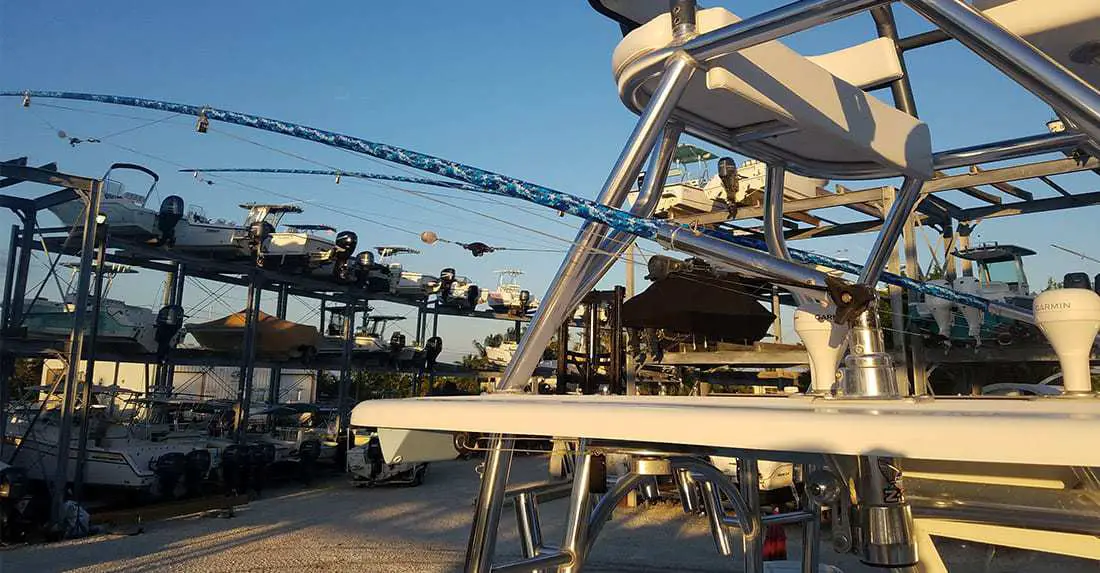
Some fixed-length outriggers allow you to lay them almost flat on the hardtops when they are not in use, minimizing this problem. But they will still be sticking out past the aft of the boat when you are parked in the slip or at your dock.
Other, more complex outriggers employ a telescopic or collapsible style for the poles. These allow you to extend or retract the pole to customize its length, kind of like a telescope (this is where they get their name from).
When you are not trolling or otherwise using your outriggers, you can retract them down to their minimum length and easily fit your boat into low-clearance areas. As well as into tight slips in between other boats at a dock.
While telescopic outriggers are more sophisticated than fixed-length ones, they often cost more and require more routine maintenance to function properly.
Gunwale-mounted VS. Hardtop-mounted Outriggers
Traditional outriggers employ a gunwale-mounted style (also known as a side-mounted outrigger). These outriggers affix to the gunwales on either side of your boat to allow for trolling.
Gunwale-mounted outriggers are often cheaper than hardtop-mounted outriggers, but they tend to come in the way when you want to move around in your boat. They also are usually only available up to a certain length. Around 18 feet or so.
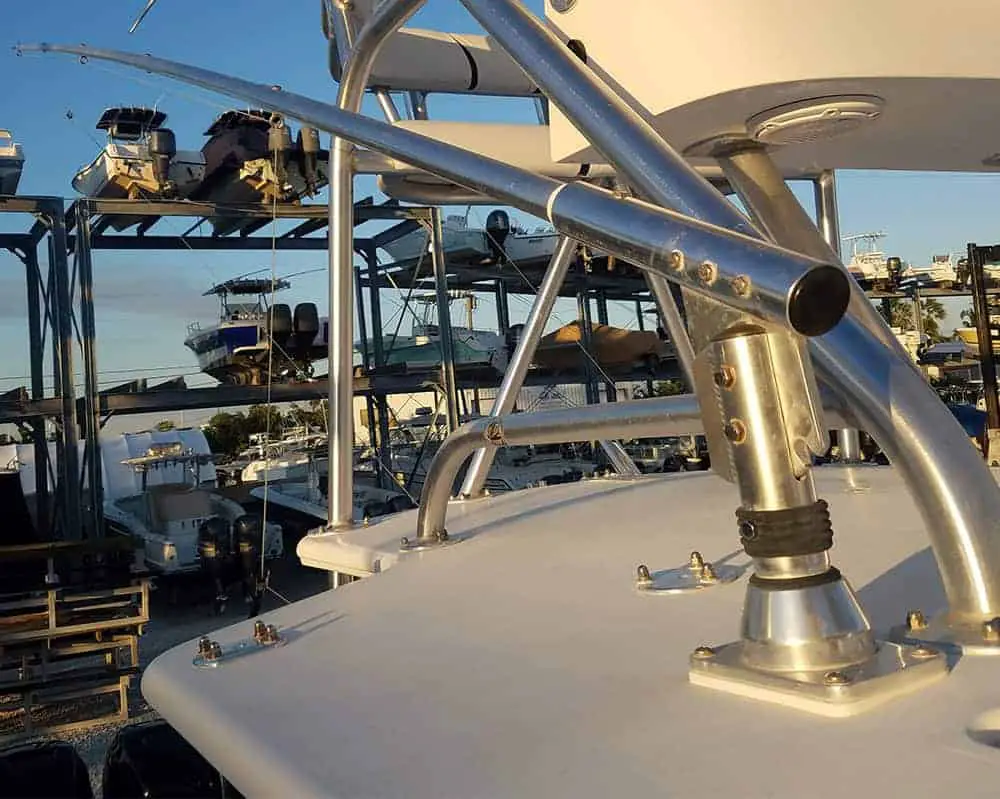
On the other hand, hardtop-mounted outriggers mount at a greater height on top of your boat. This prevents them from being a hindrance to movement inside the boat. Nonetheless, this comes at a cost.
Hardtop-mounted outriggers tend to be much more expensive than gunwale mounts. Additionally, if you have an outrigger base that does not allow you to easily change the angle of the poles from within the boat, you might have to climb on top of the hardtop to do so.
This can be dangerous and not to mention a pain whenever you are offshore fishing in rough seas.
Spreaders or No Spreaders
Some outriggers come with included spreaders. These perpendicular bars shaped like an X lie along the length of the pole.
Each spreader supports a number of different taut wires that add stiffness and rigidity to the pole to prevent it from buckling under the load. If you have a long outrigger pole, or if you like to troll for larger fish at higher speeds, it is a good idea to get an outrigger with spreaders.
Spreaders also allow you to create more space between stacked lines and prevent tangling. (The process of stacking refers to adding more than one line to an outrigger pole).
How Much Do Outriggers Cost?
An obvious question you may have if you’re looking to purchase an outrigger is how much do they cost. The short answer is: it depends.
There is no fixed rate for any outrigger, and its cost depends on a multitude of factors. Including the manufacturing brand, the construction material, the length of the poles, and extra functionalities.
Like spreaders and the ability to retract the poles like a Telescoping outrigger set. You can buy a pair of simple outriggers for about $100 on Amazon, which is questionable out the gate! Or you can buy extremely high-end outriggers that cost upwards of $10,000!
However, if you’re looking for the best bang for your buck, you can pick up a quality pair of outrigger poles in the $500 to $1,000 range. Alternatively, you can buy a complete outrigger package with rod holders, poles, and rigging kits for $2,000 to $3,000.
Usually, companies like Taco Marine are the go-to company for quality and well-priced outriggers.
How To Install A Set Of Outriggers
Installing a set of outriggers can seem very complicated and frustrating if you don’t know the proper procedure. Lucky for you, we are here to show you the way.
The first step to installing outriggers is to install the outrigger mount or base to your boat. This step involves welding an extrusion plate to your boat’s T-Top. Which might necessitate hiring a professional.
As well as removing the T-top canvas in order to do the welding too. Here’s a video we did on restringing the T-top canvas and installing the lights and stuff as well:
Make sure to get the right-sized plate for your boat’s T-top though so that the welder can install it properly.
If you are a handyman who prefers to do these sorts of things yourself, do not worry.
The rest of the process is relatively simple and straightforward. It does not require any special tools and you can easily do the rest on your own. All you need is an Allen key wrench, a knife, a screwdriver, and a blowtorch or other source of heat.
Take your knife and heat it up on a stove or with a torch. Once it is red-hot, take it out of the flame and use it to cut the canvas above the extrusion plate.
The heat will allow the knife to go through the canvas like butter. And you can easily cut a hole for your outrigger base to go through.
Next, you want to coat the area on top of your T-Top where the mount will go. Using some elastomeric or boat life sealer is the way to go! This allows for a secure, water-tight fit that prevents the roof of your T-Top from leaking.
Place your mount at the top, and screw it into place inside the extrusion plate with a screwdriver.
The next step involves installing the handle on the base of the mount. Simply slot the handle in its place, put in the provided screws, and tighten them up with an Allen key wrench.
Presto! You’re done installing the outrigger mount. It really is as simple as that! All that is left is to rig your outriggers, and you will be ready to go trolling on the high seas.
One thing that you should keep in mind is that though all outriggers follow roughly this same process, every outrigger is slightly different from each other.
Your particular outrigger might require little adjustments or additions to this process for proper installation. We recommend that you always read through the user manual of your outrigger before picking up any tools.
How To Rig Your Outriggers
Now that you have installed your outrigger mount, the next step is to rig your outriggers before you can use them. A typical outrigger pole is able to support two different lines.
To rig each line, you will need a long cord, a stopper, a swivel, three crimps, and a hand crimper. (optional – you can tie knots if you don’t want to use a crimp, but crimping is usually stronger)
A tension release clip, a snubber, and a way to attach the snubber to your line. It can be a rather difficult nuisance to source all these different items separately. So outrigger manufacturers often supply all of these in a rigging kit.
You should always buy such a kit with your outriggers rather than scouring your local market for all the different pieces. If you just need the rigging and already have the outriggers.
We recommend Taco Marine’s outrigger rigging kit, it comes with everything you will need!
To rig your outrigger, the first thing you should do is to take your cord and pull it through all the different loops inside your outrigger pole.
If your pole has rollers attached to each loop. Make sure to thread the line through the same roller on each loop to prevent the lines from tangling up.
Once you thread the line through the top roller.
Loop it back and thread it through the stopper, crimp, and swivel. Make sure you thread it through the items in that specific order. Otherwise, you will end up with an improperly set up outrigger.
After you thread the cord through the swivel, take the end of the cord and thread it through the crimp again. Creating a loop around the swivel. Then, take your hand crimp and crimp the line down to attach the different accessories to the line securely.
To size the line up correctly and make sure that the tension is just right. You will need to mount the snubber on your boat first. To do this, pick a sturdy spot on your boat that is high enough not to cause interference with movement.
This will keep all your rigging for the outrigger overhead and prevent you from hitting your head on the line. An ideal location would be the upper cross-pipes of your T-Top. Make a small loop with your rigging line around the crosspipe, and crimp it down.
Alternatively, you can screw in a camelback bracket to the side of your boat. (However, this does involve screwing into your boat and also requires the use of a drill.)
Clip the other end of your snubber to the wire loop (or bracket), then go back and attach your pole to the outrigger mount. Take your outrigger line and pass it through the last bearing of your snubber.
Adjust the tension in the line till it doesn’t sag down, and then thread it through another crimp. Take the other end of your outrigger line and thread it through the crimp as well. Making a big loop along the length of your outrigger pole.
Cut off the excess line, and then use the crimper to crimp down the line maintaining the tension.
Now that you’re done with your first outrigger line, it is time to do the second one. Takedown your outrigger pole and follow the same steps for the second line.
Just use the different rollers on your pole for this line and pass it through only two of the four loops along the length of the pole. When you reach the step of attaching your line to the snubber.
Make sure to loop it through the other free bearing instead of the one you previously used. Match the tensions in the two lines so that neither of them sags.
Then, crimp it down, and you’re done. Now you have a fully rigged pole. Follow the same steps for your other pole and you will have a fully functional outrigger setup allowing you to troll four lines at once.
Different Ways Of Using Your Outriggers
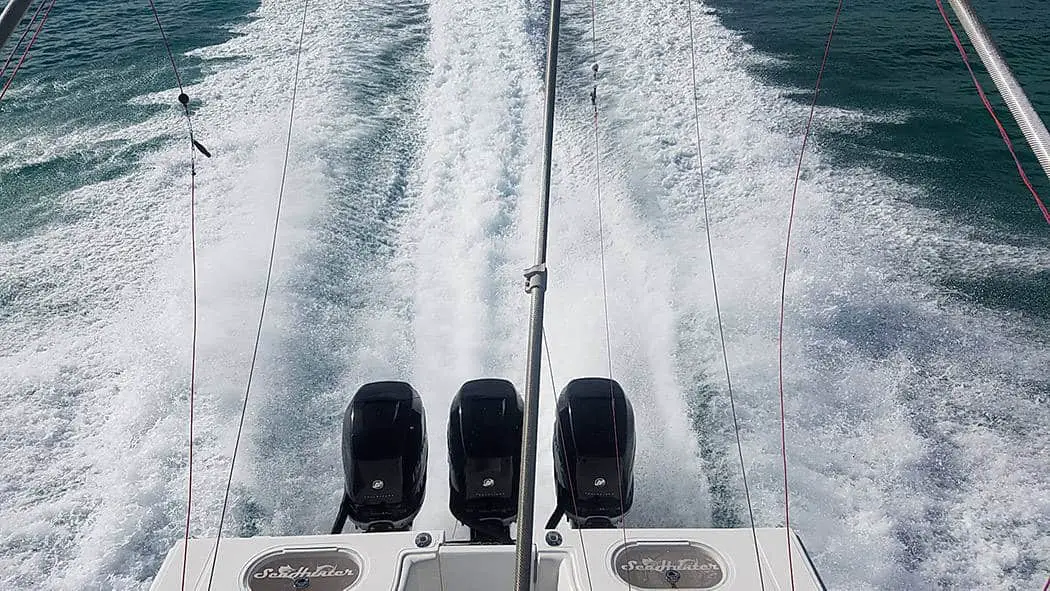
The primary function of outriggers is to hold multiple lines while you troll the high seas to increase your chances of catching fish.
Normally running either a diamond pattern with your baits. Or up to eight lines all at different lengths from the back of the boat.
However, with a sturdily installed outrigger, you can get extremely creative with its applications. Watch this video below to see a boat pulling two water-skiers with its top-mounted outriggers.
Check Us Out!
Now that you know all about outriggers, here are some other articles that we have written that we know you will find even more helpful!
Does YOUR Boat Have The Right Propeller? & How To Check!
Outboard Jack Plates, Everything You Need To Know!
If you’ve got any questions or comments, let us know by subscribing to our YouTube Channel!
And if you would like to support us to continue bringing you great content, please click the link below to Amazon where we get a commission from anything you are already going to buy!
Click Here To Amazon!
And you can also donate by clicking the donate button here or on the right hand of the screen!
It really helps us out and we thank you so much for your support!
Thanks for reading and we look forward to reading your responses and comments.
We’d also like to invite you to check out our YouTube Channel where we create all kinds of How-To and DIY boating videos. To help you learn more and more about your boat and how it works!