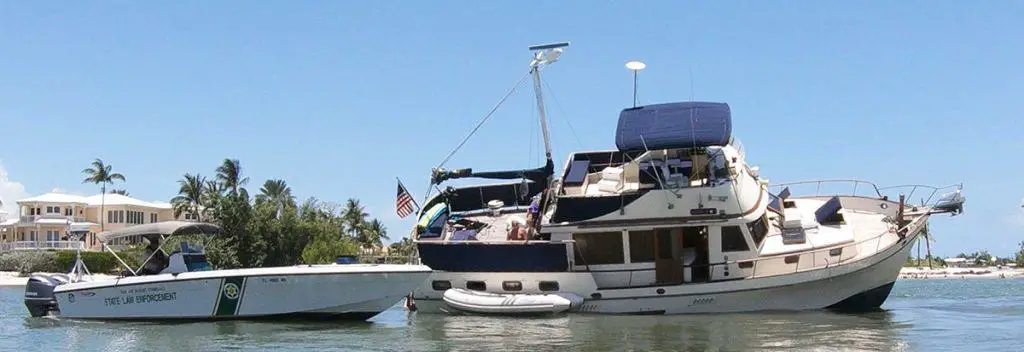
Purchasing a boat can be a huge investment. It can be a great experience that lasts for many years. Or it could turn into a nightmare that leaves you disgusted to even see the boat. There are some ways to make sure you don’t get stuck with the nightmare option!
How To Inspect A Boat Before Buying: You need to inspect three major parts of a boat before buying it. You need to inspect the engine, the boat’s hull, and the components that are in the boat.
Here is a step by step guide to walk you through inspecting a boat and it’s components before purchasing it to make sure you don’t buy a dud!
Inspecting The Boat’s Hull
 We like to begin the boat inspection by checking out the hull first. After we check the hull, we will look into the engine on the boat, and after that, we will look at the boat’s systems.
Doing the inspection in this order is important because it will save us time.
If the hull isn’t any good, then there’s no need in looking at the engine. Then if the engine is no good, then do we really need to spend the time looking over the boat’s components?
Now, as long as we aren’t talking about a project boat. Which is a little different because when looking at a project boat. We are expecting to see multiple issues with different things on the boat.
The inspection process is very similar, with the exception that we are weighing how much it will cost us to restore the boat. Verses how much we are going to pay.
We have another article dedicated to the Most Important Things That You Need To Know Before Buying A Project Boat. If you are interested in project boats, you’ll want to read that.
For a normal inspection though, we need to consider a few things.
Considering The Age Of The Boat
The age of the boat is going to play a big part in the boat inspection. Older boats will often have different issues with them.
You could be looking at having rotten major structural parts of the hull, but we’ll talk about that in a minute.
The older a boat is, the more damage you are going to find. So when inspecting, it’s important to keep this in mind because you don’t want to be looking at a 30-year-old boat.
While thinking about a five-year-old boat. They won’t look the same and we shouldn’t expect them to.
The stainless steel will rust a little, the aluminum components will start to pit. T-Top aluminum will get pitted, the canvas will get thinner, and if these things haven’t been cleaned for awhile. Then you will see that.
We want to look for broken components more than just dirty items. Since it’s a boat, there’s almost nothing that can’t be cleaned up or have new canvas put on it. As long as it’s not broken!
Here is a video of ours demonstrating how easy it is to clean and restring a T-Top with new canvas:
Checking The Outer Hull For Damage
We also need to run around the outside of the hull to look for damage.
We are looking for marks in the front and on the keel of the boat. To see if there is any location where the boat had an obvious hard grounding event.
If you have spent enough time on the water, then you will have eventually hit the ground. At least once or twice, maybe even more than that! It happens, it’s not that big of a deal.
As long as it wasn’t too hard and on a hard rocky surface. That can cause significant amounts of damage, then it’s no big deal.
Here’s an article that we have written about What To Do When You Run Aground In A Boat! You will find that super helpful if you haven’t already run aground and found out the hard way yet!
We will also be looking at the transom of the boat. Making sure that the transom isn’t rotten. We can check that by just tapping around on it in different locations. Listening for a hollow sound.
If it sounds hollow. Then the transom is rotten in those locations and will be questionable, depending on how bad it is.
We need to go around the entire hull listening for these hollow sounds. As well as inspecting for damages to the fiberglass.
This will show us the condition of the exterior hull.
Making Sure The Hull’s Stringers Are Solid
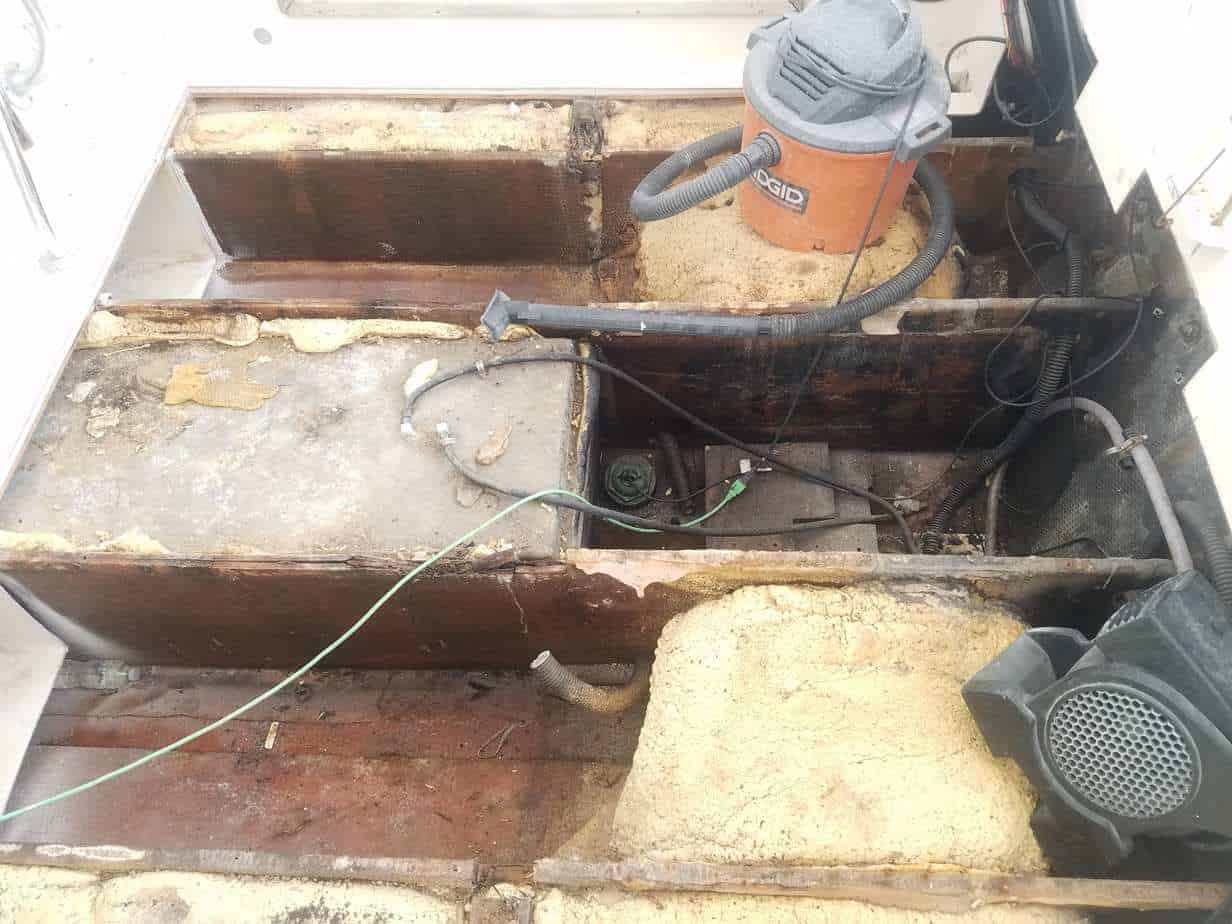 Once we get through the entire outside of the boat’s hull. We need to move to the inside of the boat and start inspecting the inside portion of the hull.
Again, depending on the age of the boat is going to determine how important this is. Most boats from the past 20 years are not made from solid wood.
Therefore, they don’t have the same likeliness of having a rotting transom or stringers.
The boat’s stringers are pretty easy to check. These are the part of the boat that gives the hull it’s structural strength.
They generally run from the bow of the boat, all the way through to the back of the transom. We can simply take a hammer and knock on them in order to listen for that hollow sound again.
With a solid thud, we can have confidence in the stringers and move onto other parts of the boat.
Inspecting The Boat’s Inside & Compartments
Knowing that the boat has a solid hull and solid stringers. We can look through all of the compartments of the boat.
Opening up every hatch and looking down into all of these compartments. What we are looking for is just the general condition of the compartments.
Are they clean? How is the wiring inside of them if they have wiring in them? Is anything coming with the boat?
These are all questions that we can answer as we look through this part of the boat. Think about the hinges, the latches, and the way they close. How is water going to flow around the access?
Does it look like water will run around or away from the compartment? Or is it apparent that water runs directly into the compartments, leaving you with no dry areas on the boat!
As long as you are pleased and everything checks out. We can move onto checking out the integrity of the engine!
Inspecting The Engine
Performing A Visual Inspection Of The Engine
 Inspecting a boat’s engine is a vital step! It goes without saying that marine engines are not cheap. And they are getting more and more expensive by the year!
With all of the advancements in technology, they are getting more reliable though. More fuel-efficient, and smoother running with less shaking and oil smoke.
Which makes for a more desirable experience while on the water. In order to know what the condition of the engine is. We will want to do a visual inspection of it, just like we did with the boat.
We will want to take the cowling off and look around the engine. Looking for massive amount of salt build-up, water markings, rust, and other visual aspects of the engine.
Look at the propeller and see if it has any dings or markings. What does the lower unit look like? Is the paint all marked off and it looks like it was drug across the ground?
This will get us started with the engine inspection.
Making Sure The Engine Has Spark & Compression
After the visual. We want to check the integrity of the engine. This is done by way of performing a spark and compression check of the engine.
We will need to remove the spark plugs for this test. Which will let us know about how old they are, just by looking at the plugs.
Then the spark test is going to let us know that the ignition system of the engine, is basically operating properly. Telling us that all of the cylinders are sparking.
The compression test is the life of the engine though. Without compression, the engine is worthless!
Then, on the other hand, though, low compression will let us know that the engine is actually. Possibly on its way out the door.
If you are unsure of performing a spark and compression test. You will want to read this article that we wrote. It will teach you Everything You Need To Know About Outboard Compression Tests!
Now as long as everything checks out with the compression test. We can move onto another expensive portion of the engine. Being the lower unit or gearcase!
Checking The Engines Lower Unit
The engine’s gearcase can get up over $5,000 to replace it if it blows up! So knowing that it is in great condition is something we want to know about.
We can do this by simply pulling the prop off and checking to see what the lower unit prop shaft seals look like. These seals are replaceable and we have a video, as well as an article to teach you The Easiest Way To Change Outboard Prop Shaft Seals.
Depending on how these seals look, it will tell us a little more about the condition of the lower unit.
If they are all burned and have fishing line stuck in them, they are probably a candidate for being replaced!
The next thing we will do is we will inspect the lower unit’s gear lube condition.
This is simply done by slowly unscrewing the drain seal. Then barely opening it so that a little bit of gear lube comes out of gearcase.
The color of the lube is going to tell us a lot about the condition of the unit. We won’t break down all of the different colors here.
For a more in-depth description of the different colors and what they mean. Read our article that teaches you all about The Different Colors Of Outboard Lower Unit Oil & What They Mean.
Looking At The Engines History & Codes
The last thing that we will look at on the engine. Is the engine’s run history and fault codes.
Most engines that have been manufactured in the last 20 years. Will have the ability to show you these two things.
The engine will store the run history and all fault codes, with some interesting information to go along with it!
It’s pretty amazing, the run history is actually broken down into RPM ranges as well. That means that you can see how many hours the engine was run for and at what RPMs.
For example. Usually, this is broken down into something like:
- 0-1,000 RPMs: 850 hours
- 1,000-2,000 RPMs: 300 hours
- 2,000-3,000 RPMs: 400 hours
- 3,000-4,000 RPMs: 500 hours
- 4,000-5,000 RPMs: 75 hours
- 5,000-6,000 RPMs: 60 hours
- 6,000+ RPMs: 2 hours
- Total Hours: 2,187 hours!
This is actually really useful and will tell us a lot about how the engine was run and taken care of.
Giving us a good overall understanding of what condition this engine is in.
Now, you can get a lot more hours out of an outboard then only 2,000 depending on how it is taken care of. Here is an article that we wrote that will show you How To Get More Hours From Your Outboard!
Inspecting The Boat’s Components & Systems
Inspecting A Boats Fuel Tank
With a good hull, great engine, and almost a full inspection done. We want to take a look at a couple of things before we sign on the dotted line.
One of them being the boat’s fuel tank. You never want to have to get on the boat and smell fuel! That’s a terrible feeling, and in case you ever run into that situation. Here is the information for What You Should Do If Your Boat Smells Like Fuel!
We are going to look into the fuel tank access port and see what the top of the fuel tank looks like.
You want to see a clean, nice, good looking tank. You don’t want to see a bunch of sludge, slime, dirt, and corrosion build up on the tank.
That could mean that it is getting close to the point where the tank will need to be pressure tested. And then possibly removed and replaced!
Which can be a super expensive task and something that you want to know about before it happens to you!
Looking Over A Boat’s Wiring
One of the last couple of things that we need to consider in the inspection. Is the condition and situation that is going on with the boat’s wiring.
If you see a bunch of home electrical connectors. Un heat shrank connectors, and just wires laying everywhere in a rats nest.
Just remember that someone is going to have to mess with that when things start to stop working.
You want to make sure that you know what you are doing before you just up and say that it is ok. This is a huge problem area and can turn into a nightmare.
If you are comfortable with DC wiring, then it isn’t as big of a deal. But if you don’t know anything about it. Just be aware that this is eventually going to be an expense, and do you want to be paying for it?
Thinking Ahead About The Electronics
The same thing goes for electronics. These can get super expensive and depending on the age and condition.
Is this an expense that you are looking forward to? If the electronics screens are illegible, then are you going to replace them at the cost of new electronics.
Or could you use someone like Gaugesaver.com to help you? They can change the screens and fix the LCDs to make them legible.
But are they so outdated that it isn’t worth it?
Just be aware of this and have a plan for this expense in case it is fitting for the boat that you are inspecting!
You can also check out our video on this entire process here:
Check Us Out!
Now that you know how to inspect a boat! Here are a couple more articles from us that you will find super helpful!
How To Tie Up A Boat! Don’t Wake Up With it Underwater!
Can Boats Be Stored Outside In The Winter? Yes or No?
We’d also like to invite you to check out Our YouTube Channel! We create all kinds of How-To and DIY videos to help you learn more and more about your boat and how it works!