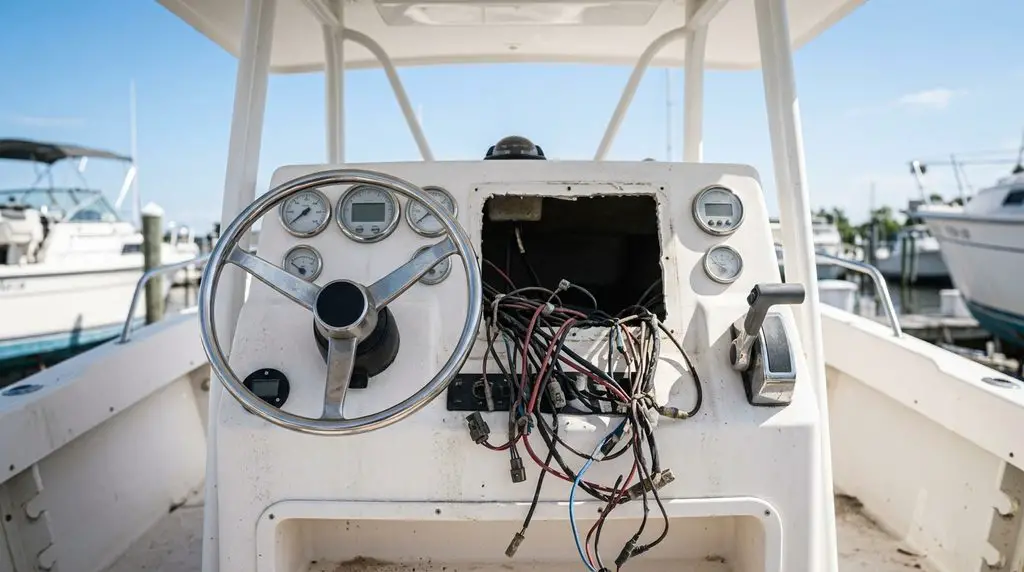
You pull the old VHF out and there’s a hole that doesn’t match the new radio, screw holes sticking out past the bezel, and an existing hole that’s a half inch too small for the cable you need to run through it.
That’s electronics upgrades. The install itself is the easy part. The problem is always what the last guy left behind and the fact that manufacturers change their plugs between generations so nothing crosses over.
We did a two day job on a triple 350 Verado boat: a 20 hour service, a Garmin VHF swap, a VesselView 703, and a trick for enlarging a hole saw hole with a hole saw that I use constantly.
Why It Matters
Two things worth knowing before you start.
First, the plug compatibility problem. Garmin changed the plugs between the VHF 300 AIS and the VHF 210 AIS, so the two systems don’t talk to each other. That means if one component fails on a discontinued system, you’re replacing the whole thing unless you can hunt the part down online. Worth knowing when you’re deciding whether to repair or replace.
Second, the 20 hour service. On a new engine, all the gears, bearings, piston rings, and other moving parts are freshly machined. The break-in period is where they smooth each other out and fit together. That process dirties the oil and gear lube fast, which is why manufacturers require the service. All it is is changing the engine oil and the gear lube. It’s a controversial topic and we wrote a whole article on break-in, but the service itself is simple and not optional.
Products
- Garmin VHF 210 AIS — the replacement radio.
- Mercury VesselView 703 — engine data display at the helm.
- VesselView Link — Mercury dropped the older NMEA 2000 gateway for this; it ties the backbone to the display.
- Black StarBoard — covers old screw holes that the new radio won’t hide.
- Reciprocating saw — cuts both the radio hole and the fiberglass for the display.
- Hole saw and a scrap 2×4 — the enlarging trick.
- Blue painter’s tape — shims the wood plug and protects fiberglass while cutting.
- Wire snake and pull string — gets cables through rigging tubes.
Step-By-Step Guide
Start With The 20 Hour Service
Change the engine oil and the gear lube on all three engines. That’s the whole service. Get it out of the way in the morning.
Strip The Old VHF
Get access behind the active speaker first, then follow the cables and pull zip ties as you go. You want to run strings through those paths so you can pull the new wires later. Don’t skip that, it’s the difference between a clean pull and fighting a snake through a packed rigging tube.
Pull the bezels off the top with a knife, take the screws out of the speaker, and get the speaker out.
Deal With The Hole You’ve Got
Now you can see what you’re actually working with. On this one the old screw holes sat outside the footprint of the new radio, so there was no hiding them.
I made up a clean piece of black StarBoard to match the radio, rounded the edges, and screwed it into place. Now you’ve got a solid surface to cut your new hole into and the old damage is gone.
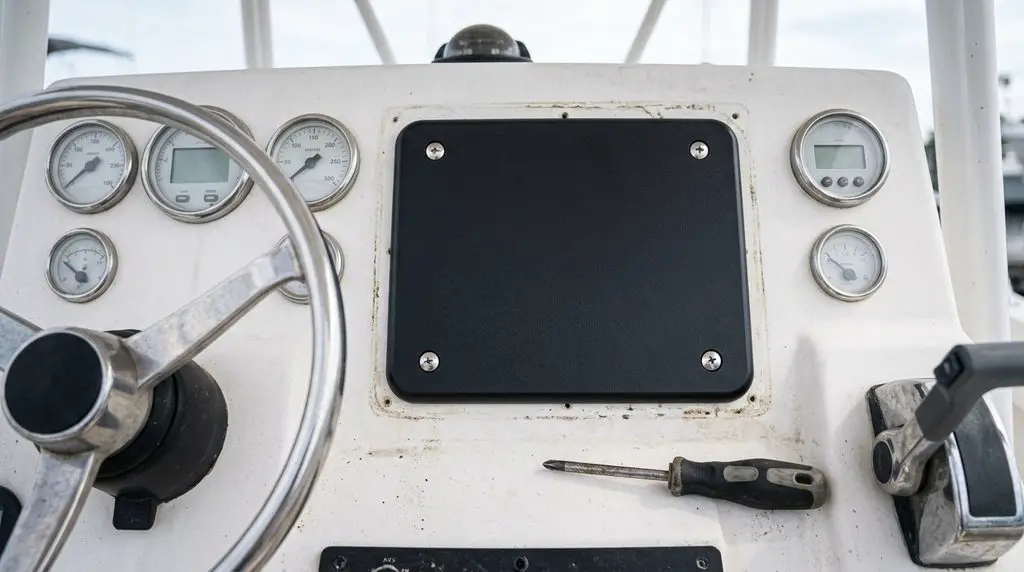
Template on, cut the hole with the sawzall, drop the radio in, screw it down, change out the mic hanger.
Pull The Wires
Cut out the zip ties, get the antenna wire over to the rigging tube, tie the NMEA 2000 cable to it, and pull it up to the radio.
Hook up the antenna, the NMEA 2000 cable, 12 volt power, and the cable running to the upstairs station.
Getting that cable upstairs was easier than it could have been. The rigging tube had a canvas cover with a zipper over it and the tube was full of holes, so I could work a snake and then the cable up into the second station’s electronics box.
Second Station Mic
The new handheld mic up here is corded, so it couldn’t hang straight up and down like the old one. I mounted it on an angle and put the cable hookup where the old wire came through.
Which created the next problem.
How To Enlarge A Hole Saw Hole With A Hole Saw
This is the trick worth the whole video.
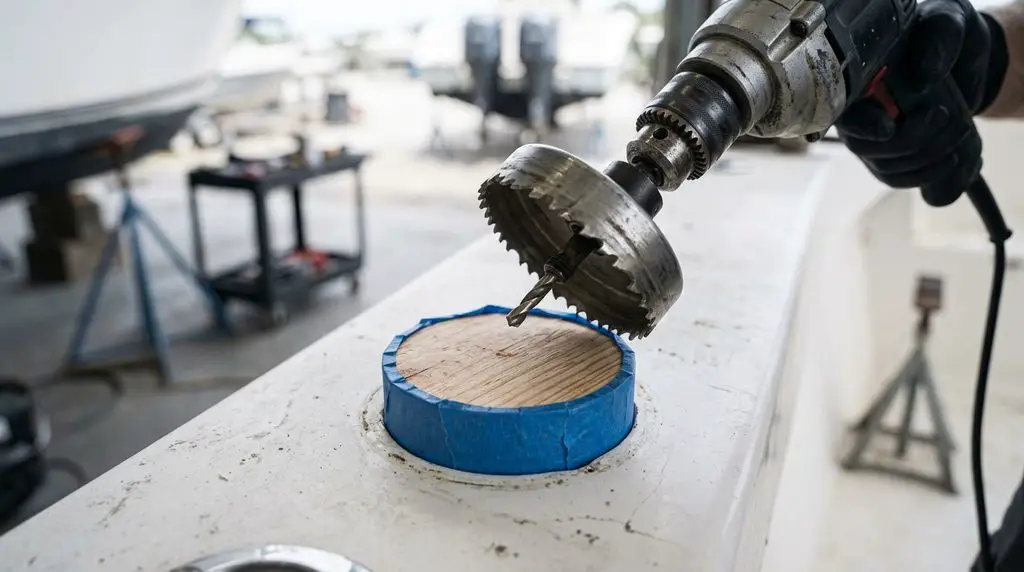
A hole saw has no pilot once the hole already exists, so it skates and chews up whatever you’re cutting. Here’s the fix.
Take a bigger hole saw and drill a plug out of a scrap 2×4. You now have a wooden circle. If it doesn’t fit the existing hole exactly, wrap it a couple times with blue painter’s tape until it sits snugly inside.
Stick the wood plug in the hole. Put the hole saw’s pilot bit into the wood and start the cut slowly and carefully. Once the hole saw is deep enough into the material, you can apply pressure and finish the cut.
Works like a dream and doesn’t destroy whatever you’re drilling.
Make Room For The VesselView
Where the 703 needed to go was tight. I pulled the autopilot out to see how much space I could gain, cut out some of the side where it sat, and moved it over as far as it would go.
Cutting Fiberglass For The Display
Tape up the whole area around the cut with blue painter’s tape. Two reasons: it keeps the glass from chipping, and it protects the surrounding glass if something goes wrong, like a blade breaking.
Get the template in place exactly where the screen will sit. Drill a hole in one corner of the template to get the saw blade in, then cut carefully around the template until it’s fully out.
Moment of truth. This is the beauty of a template. If it’s the right one, the part drops in like a dream.
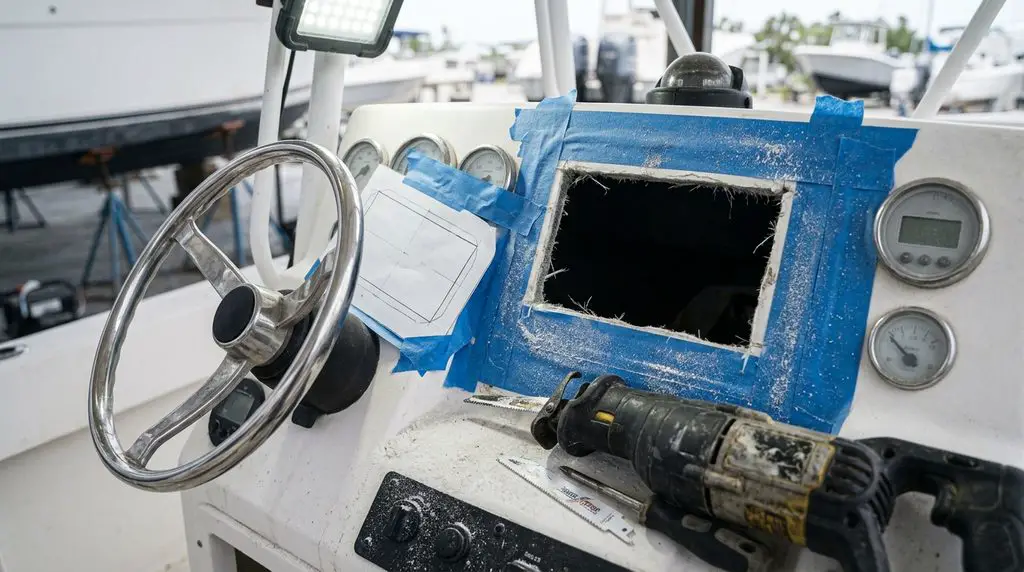
Drill the screw holes, pull all the tape, clean it up, screw the screen in, and slide the bezels into place.
VesselView Link
These hook up differently than the old stuff. Mercury got rid of the older NMEA 2000 gateway and replaced it with the VesselView Link, which ties into the NMEA 2000 backbone and the display.
Screw the link box to the back of the helm, run the wires to the backbone and to the back of the gauge, hook it up, and zip tie everything neatly.
Setup
The new gauges use an auto selector. Pick a language and they basically configure themselves. The fuel gauge is the exception, that one you set manually.
Pro Tips
Run strings before you pull anything. When you’re cutting zip ties and following the old cable path, tie a string in behind you. You’re going to need that exact path again in an hour and the rigging tube won’t be any friendlier the second time.
StarBoard is your out on mismatched holes. Don’t try to make a new unit cover old screw holes it was never going to cover. A clean piece of black StarBoard matches most modern electronics, gives you a fresh surface to template on, and looks intentional instead of patched.
Tape the glass every time. The chipping prevention alone is worth it, but the real reason is the broken blade scenario. A sawzall blade letting go against bare gelcoat makes a mess you’ll be fixing for an afternoon.
Final Verdict
Worth doing yourself, with one honest caveat.
The wiring is straightforward. Antenna, NMEA 2000, 12 volt, done. The pull is tedious but it’s not skilled work. The VesselView Link is a box you screw down and plug in.
Cutting fiberglass at the helm is where people get nervous, and they should. You get one shot. But a template plus tape plus going slow removes most of the risk, and the template is doing the actual work. If the template’s right, the part fits.
If you’re not comfortable putting a sawzall into your console, that’s the part to farm out. Everything else here is a Saturday.
FAQ
Are Garmin VHF 300 and VHF 210 systems compatible?
No. The plugs changed between generations, so you can’t mix components. If something fails on a discontinued system you’re replacing the whole thing unless you can source the specific failed part online.
How do you enlarge an existing hole with a hole saw?
Cut a wood plug from a 2×4 using a larger hole saw, wrap it in blue painter’s tape until it fits snugly in the existing hole, then use the plug as a pilot surface. Start slow, and once the saw bites into the material you can apply pressure.
What is a 20 hour service and do I need it?
It’s an oil and gear lube change required after break-in on a new engine. Freshly machined gears, bearings and rings wear into each other during the first hours and contaminate the oil fast. Manufacturers require it.
Do I still need a NMEA 2000 gateway for VesselView?
Not on the newer setup. Mercury replaced the older gateway with the VesselView Link, which connects to the NMEA 2000 backbone and the display directly.
Check Us Out!
We hope that this has been insightful and allowed you to understand a little bit more about outboard engine maintenance and what goes into keeping your boat running right.
If you have more questions or want to learn more about your boat and its different systems, consider joining our Boating Academy where we have created HUNDREDS of video courses teaching you basically everything about your boat!
You can also find even more helpful videos on our YouTube channel where we create even more boating videos!
And if you would like to support us to continue bringing you great content, please click the link below to Amazon where we get a commission from anything you are already going to buy! Click Here To Amazon!