Mount an outboard a half inch too low and you’ll feel it every time you run the boat. Water coming off the hull climbs over the anti-cavitation plate, sucks the stern down, kills your top end, and wrecks the ride. Mount it too high and you lose water pressure and blow out in turns.
There are a dozen rules of thumb floating around for this and most of them contradict each other. I use a straightedge, because every hull is different and the straightedge tells you what’s actually happening on your boat instead of what happened on somebody else’s.
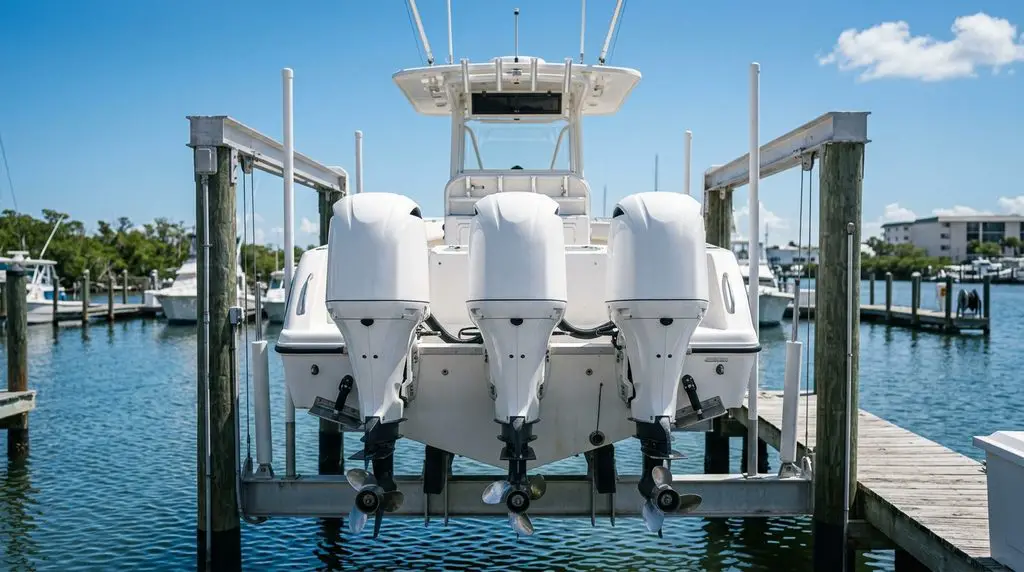
We pulled three 300 Verados off a 34 foot Yellowfin and put three 350s on it, so here’s the whole process, mounting height and tie bar setup included.
Why It Matters
Engine height is the single cheapest performance change on your boat and the one people get wrong most often. You’re not adding horsepower, you’re deciding whether the horsepower you already paid for actually reaches the water.
The failure mode is specific: water coming off the bottom of the hull should run just over your water pickups and stay under the anti-cavitation plate. If it climbs over that plate, the stern gets pulled down, the boat slows way down, and the ride suffers.
Tie bar setup is the same deal on a multi-engine boat. Get the toe wrong and the boat won’t track straight no matter how good the rest of the rig is.
Products
- 3M 4200 sealant — goes on the engine bracket around the bolt holes before mounting.
- 5200 removal, by drill — the old sealant left in the bolt holes from the previous engines.
- Lifting eye — threads into the powerhead so you can hoist the engine off the transom and out of the crate.
- Straightedge — the only mounting height tool that accounts for your actual hull.
- Torque wrench — transom bolts go to at least 55 foot-pounds.
- Power pack — lets you trim the new engine while it’s hanging, so the bracket matches the transom angle.
- Tie bar and brackets — sets toe-in across multiple engines.
- Old tires — somewhere to lay the engines you just pulled.
Step-By-Step Guide
Derigging
Disconnect the 14 pin harness. Push in the red tab and pull the fuel line. Then the CAN network cable, the power steering wire, the fuel sensor, and the power cables.
With the rigging out, pull the tie bar, then the steering cylinder hoses. On this Yellowfin there was a big starboard platform built for a cooler, so that came off and the access plates came up to reach the mounting bolts.
Pulling The Old Engines
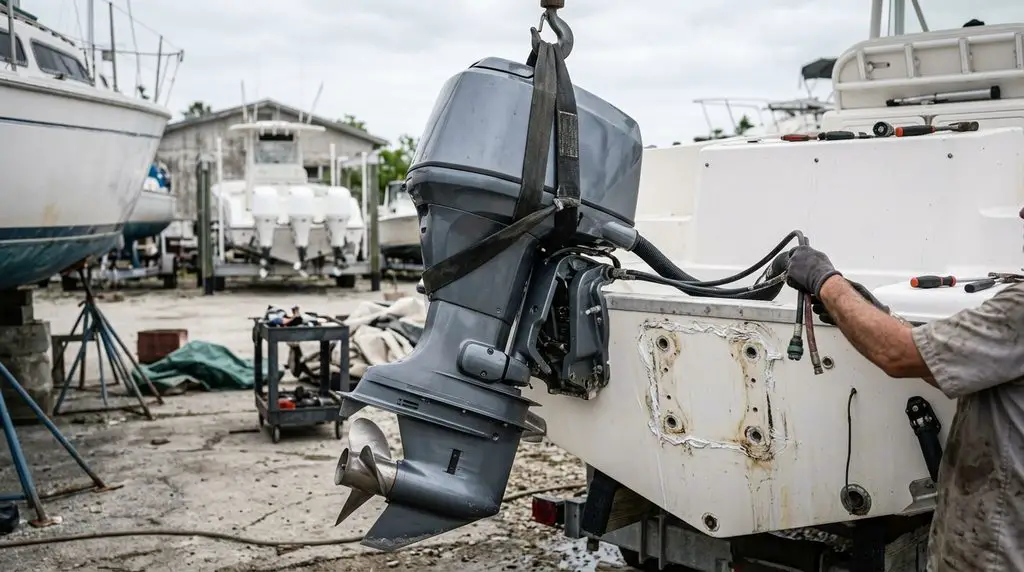
Set up some tires to lay the old engines on. Install the lifting eye, hook up, and take the weight.
Pull the four mounting bolts and work the engine off the transom. The sealant behind it fights you, so just work it back and forth until it releases.
Prep The Transom
This is the window. Engines off is the easiest time you’ll ever have to clean the transom, swap the rigging tubes, and get everything set for the new engines.
I drill out the old 5200 from the bolt holes. Takes a few minutes and saves you a serious fight getting the new bolts through.
Uncrate And Hang
Uncrate the new engines and carefully pull the cowling so you can get the lifting eye in. Lift the engine all the way up, set it back down onto the crate, then pull the crate out from under it.
On this job I moved the steering cylinder from the center motor over to the port engine, which saves time in rigging.
Set The Height Before Any Sealant
Get the engine up against the transom first. Don’t put sealant on yet.
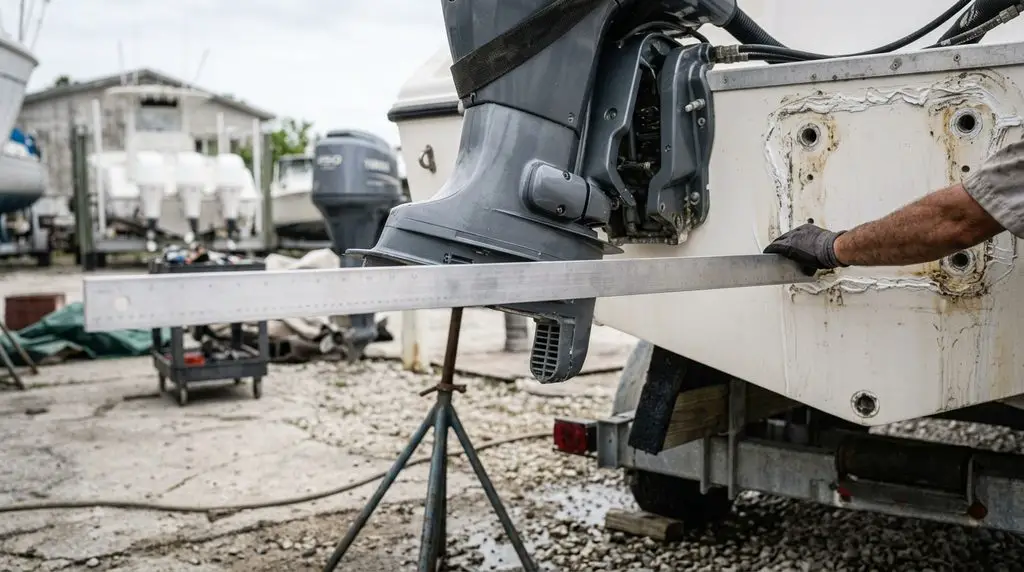
You’ll hear a lot of rules: an inch of lift per foot back from the bottom of the hull, half an inch per foot, or watch a water pressure sensor and move the engine up until you lose pressure. Every hull is different, which is why I use a straightedge.
Run the straightedge off the bottom of the hull. You want the water coming off the hull to run just over the water pickups. If you’re three feet back from the bottom of the hull, the pickups should sit just under the top of your straightedge. That gives the water room to rise and still stay under the cavitation plate.
The thing you’re preventing is water going over the anti-cavitation plate.
Mount It
Height confirmed, now put 3M 4200 on the engine bracket around the bolt holes and get your bolts ready to push through the transom.
Here’s a trick worth having: put a power pack on the engine so you can trim it as it comes close to the transom. That gets the bracket and the transom on the same angle, and the bolts slide in clean. No hammering, no chewed threads.
Nuts on, torqued to at least 55 foot-pounds.
I start with the port engine. The rigging is on the starboard side of each engine, so going port first means you can stand there and rig it completely before the next engine goes on. Saves a ton of time and frustration.
Hooking up the steering cylinders, check that the little o-ring is inside the fitting before the steering hoses go on.
Set The Tie Bar
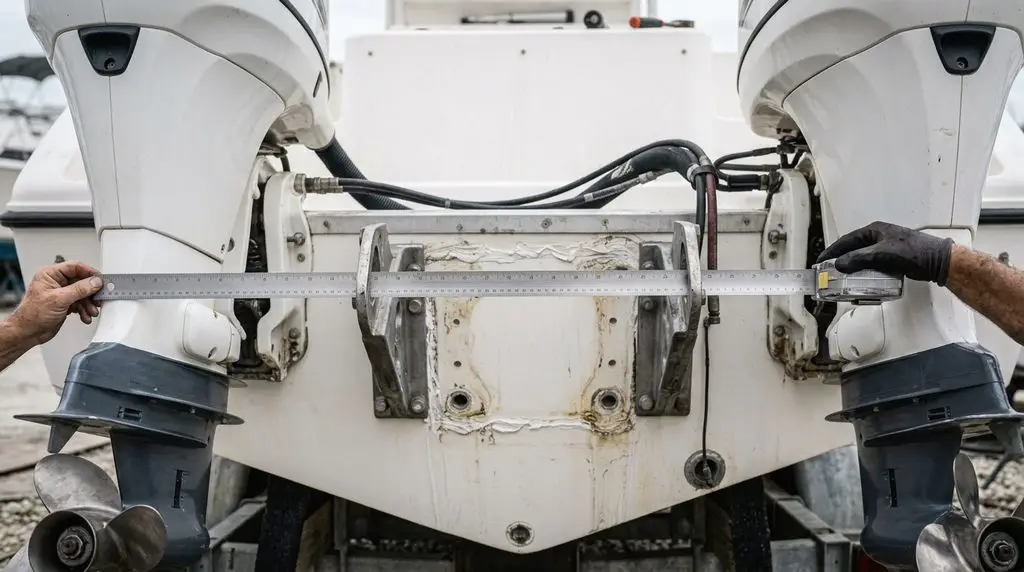
Install the tie bar brackets and one side of the tie bar, then measure the distance between the middle of each bracket. Measure the same distance between the prop shafts.
You want the tie bar about a quarter to a half inch wider than the prop shaft spacing. So prop shafts at 26 inches means the tie bar goes to roughly 26.25 inches.
That toes the engines in slightly, and the wake from each engine crosses somewhere between 25 and 50 feet behind the boat. That’s the optimal setup and it’s what makes the boat track straight.
.
Finish Out
Check and top off the engine oil and gear lube, install the props, configure the system, top off the steering, and put it in the water for a test drive.
Pro Tips
Drill the old 5200 out before you try the new bolts. It’s a two minute job that prevents a twenty minute fight, and a bolt forced through old cured sealant is how you end up with damaged threads.
Rig port first on a multi-engine boat. Rigging lives on the starboard side of each engine. Go port to starboard and you’ve always got room to stand and work. Go the other way and you’re reaching around an engine that’s already there.
The straightedge beats every rule of thumb. The inch-per-foot and half-inch-per-foot numbers are starting points somebody derived from a hull that isn’t yours. Hull shape, deadrise, and how far back your bracket sits all change the answer. Look at where the water actually leaves the hull.
Final Verdict
Setting the height is DIY. Hanging the engine is not.
The measuring, the straightedge work, the tie bar math, all of that is within reach for anybody with a tape measure and some patience. If you’ve got an engine coming off anyway, there’s no reason not to be the one deciding where it goes back on.
Lifting a 350 off a transom is a different conversation. You need the lifting eye, a hoist, somewhere to set it down, and enough hands that nobody gets hurt. On a single small outboard it’s manageable. On a triple-engine 34 footer, that’s shop work.
If you’re repowering, be in the conversation about mounting height. Don’t let somebody default it. That’s the part that follows you every time you run the boat.
FAQ
How high should an outboard be mounted?
Use a straightedge off the bottom of the hull. The water pickups should sit just under the top of the straightedge so water coming off the hull runs just over the pickups and stays under the anti-cavitation plate. Rules of thumb like an inch per foot of setback are starting points, not answers.
What happens if an outboard is mounted too low?
Water coming off the hull goes over the anti-cavitation plate, which sucks the stern down. You lose significant speed and the ride gets worse.
How much toe-in should a tie bar have?
Set the tie bar about a quarter to a half inch wider than the prop shaft spacing. At 26 inches between prop shafts, that’s about 26.25 inches at the tie bar. The wakes cross 25 to 50 feet behind the boat and the boat tracks straight.
What torque do outboard transom bolts need?
At least 55 foot-pounds. Check your engine’s spec, but that’s the floor.
Check Us Out!
We hope that this has been insightful and allowed you to understand a little bit more about outboard engine maintenance and what goes into keeping your boat running right.
If you have more questions or want to learn more about your boat and its different systems, consider joining our Boating Academy where we have created HUNDREDS of video courses teaching you basically everything about your boat!
You can also find even more helpful videos on our YouTube channel where we create even more boating videos!
And if you would like to support us to continue bringing you great content, please click the link below to Amazon where we get a commission from anything you are already going to buy! Click Here To Amazon!