
Unlike our cars, a boat’s fuel gauge sees a lot more abuse and is more prone to failure! They see a lot more water and can have corrosion issues, along with, bad and old gas issues for the fuel sender. It is not uncommon to notice that the fuel gauge isn’t reading properly anymore.
Why Does My Boat Fuel Gauge Fluctuate? The fuel gauge can be incorrect because the fuel sending unit has failed. The gauge itself has failed, or there is a loss of ground or power to the sender or gauge.
There are many different causes and situations that can create these different issues. Here are a few of the most common causes and how to diagnose and fix them!
Is the Gauge Operating Properly or is It Stuck on Either Empty or Full?
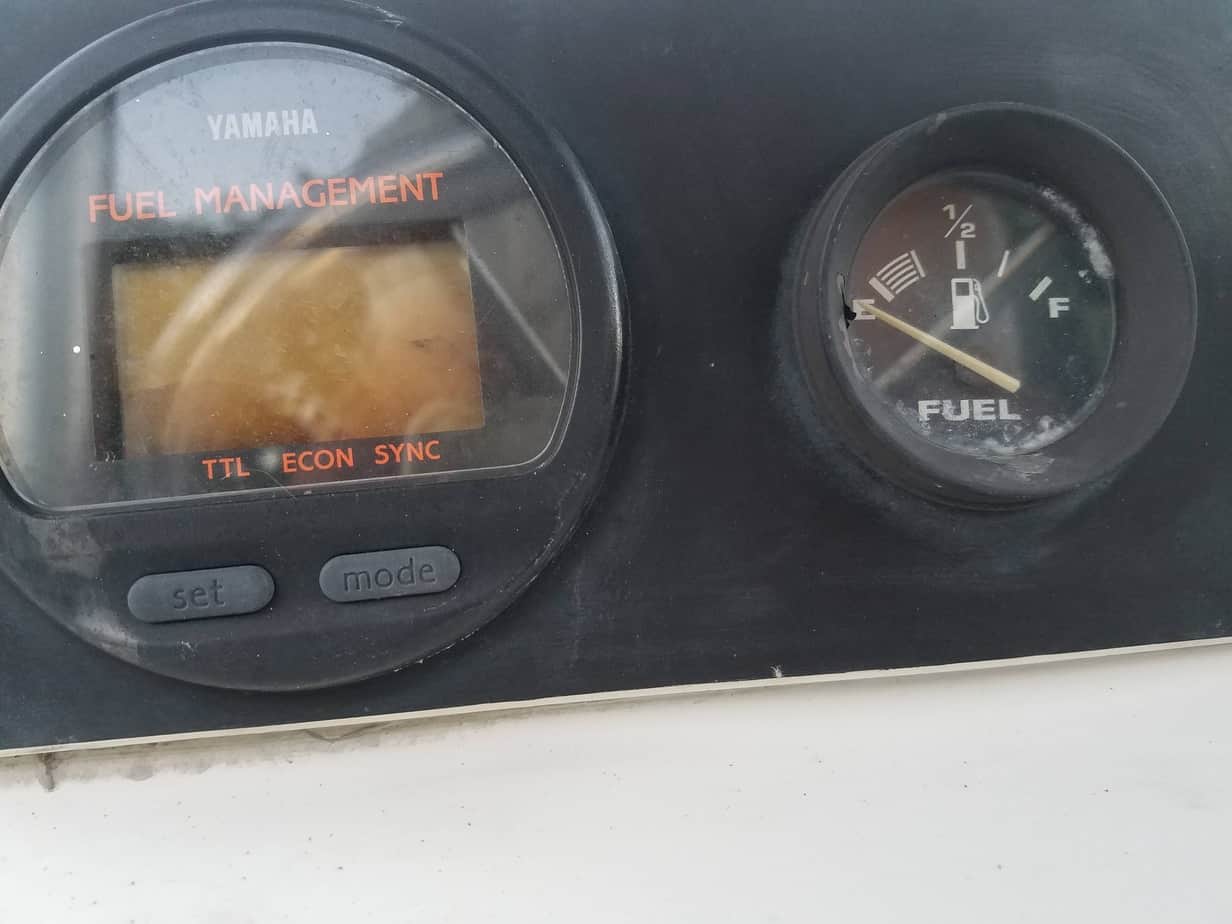
Making sure that the physical fuel gauge itself is operating properly is the first place we need to start. Analog fuel gauges function by the use of resistance. The gauge is provided a certain amount of voltage from the fuel sender. The gauge uses this voltage to know where to move the needle on the gauge.
Testing an analog fuel gauge is pretty simple and should be something you can do fairly quickly! The gauge requires 3 things to operate. 12 Volt Power, Ground to the Battery, and the Sensing Wire coming from the fuel sender in the tank.
You can either troubleshoot with a voltage meter or using external wiring, with the meter, you can check for continuity from the battery ground, to the ground post on the back of the gauge.
If there is a good solid ground that is connected with the ground to the tank, then we can check off the ground issue to the gauge.
Next, we want to check for 12 VDC Power on the power post of the gauge. Normally this will be tied into the other power posts of the other gauges.
Receiving the power whenever the key switch is in the on position. Jumping the 12 VDC power to the sending unit, the gauge should shoot straight to completely full. If we remove the sending wire and the gauge stays full. There is a problem with the gauge and it will need to be replaced.
If when you remove the 12 VDC from the sending unit post, the gauge drops to completely empty. We know that the gauge itself is operating properly and we can move on to the sending unit.
Testing With Wire!
Using a piece of wire, you can run from the ground on the battery to the back of the gauge. This will confirm you have a good ground.
Then take another piece of wire and run it from the 12 VDC power post on the battery to the power post on the gauge. Giving us a known good power source.
Then perform the same test as performed with the jumper we just talked about. Jump over to the sending post and the gauge should read full. Remove the power and it should read empty. Telling us that the gauge is operating properly and we have a problem somewhere else.
If The Gauge is Reading Empty All the Time.
Then there is either a power or a ground issue. If the gauge does not have that 12 VDC going to it, then the needle will never move.
Vice versa, if it does not have a good ground, the needle will never move either.
Perform the same tests we did earlier in order to confirm which of these two things is the issue. If we test the gauge and it moves properly and we test the power and ground, finding that it is operating properly, we know that we have something going on with the sending unit and we need to test it!
Finding the Fuel Tank Sending Unit

To perform this test. We have to find the fuel tank sending unit! Somewhere on the deck, there should be access to the sending unit on the tank. It is normally placed towards the front of the tank close to the fill and vent for the tank.
Sometimes these access’s can be very well hidden. Even under battery trays or other shelving or things bolted down to the deck. Locate this access no matter what has to be removed.
If there happens to be no access, and you know for sure where the sending unit, fill, and vent ports are. You will have to cut a hole in the deck to access them.
Installing an access port after, or repairing the hole that had to be drilled (make sure you are prepared to be this deep into your project before performing this action).
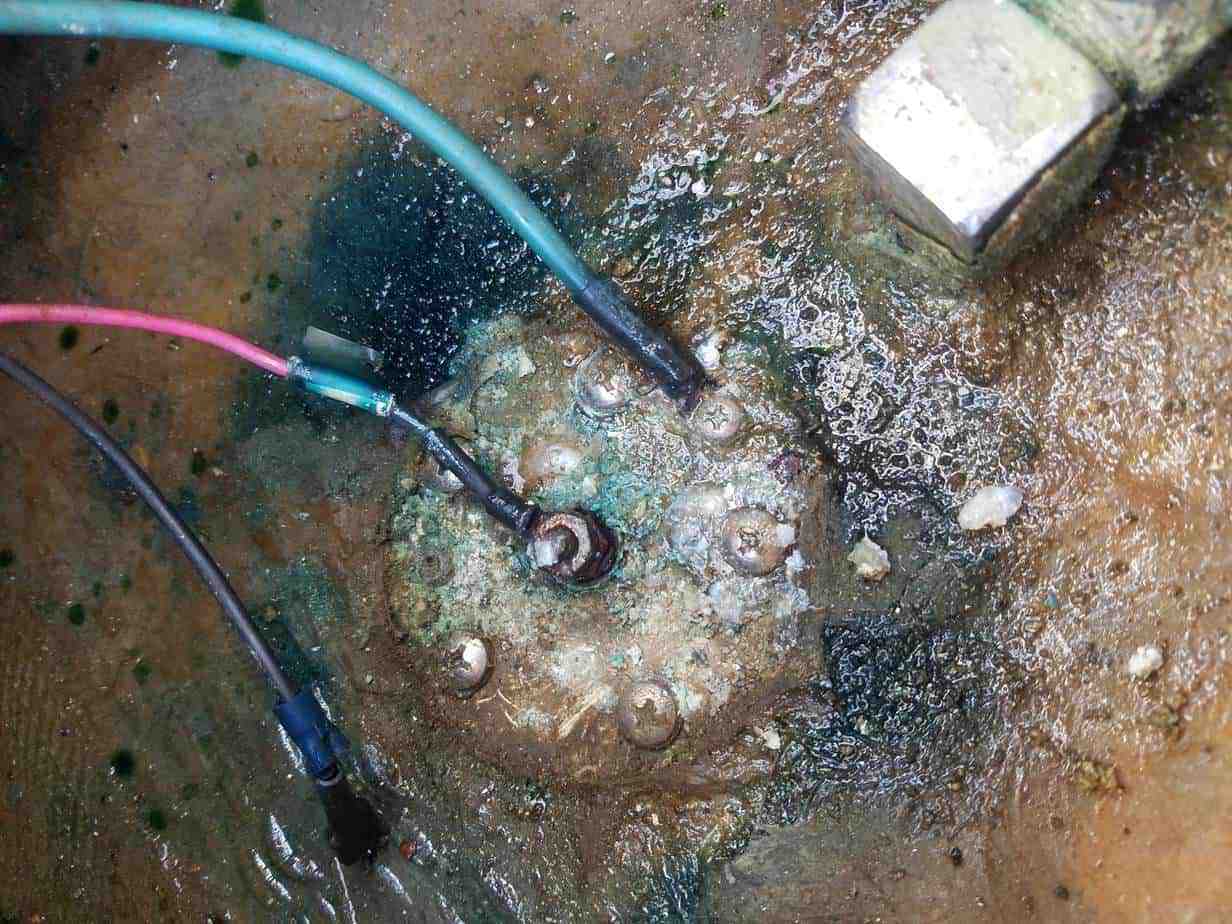
Testing the Sending Unit Wiring and Tank Ground Before Removing the Unit
Before we pull the sending unit out, we should test whether or not the wiring going to the sender and the fuel tank are operating correctly. Run a continuity test from the ground on the tank to the battery ground.
If there is a lot of resistance, run another piece of wire from the battery ground to the fuel tank and turn the key on to test the gauge again.
If the gauge is still not working properly, cut the ground or remove it from the sender and place it on the same ground we now have running from the battery ground. Turn the key on again to check the gauge. If there is still nothing…
Check the continuity of the pink wire, (which is the sending wire), from the back of the gauge to the sender. If there is a lot of resistance, run a wire from the gauge to the sender, just touching these wires together for testing purposes.
With the key on, if the gauge still isn’t reading, we almost know for a fact that the fuel sender is broken!
If we know that the gauge works, there is a good ground straight from the battery to the sender, tank, and gauge. And that we have good 12 VDC at the gauge with a solid sending wire from the gauge to the sender, and still nothing! Let’s pull out that sender!
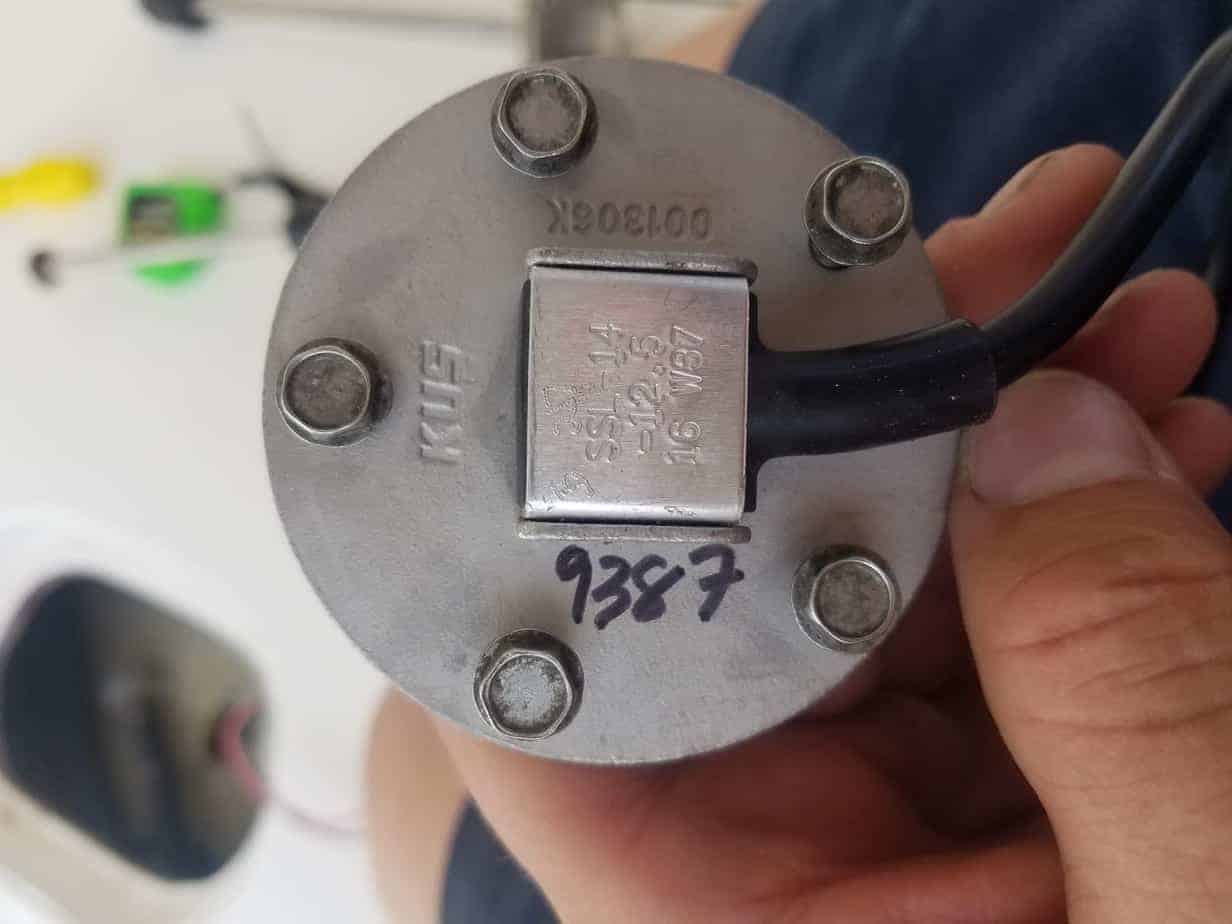
Pulling the Sending Unit
Once you find the access and get a hold of the sending unit, we need to remove it. There are many different tanks around.
Whether it be fiberglass, aluminum, or even plastic. Making sure the unit is removed properly is extremely important because eventually, it will need to be reinstalled.
The most common type of fasteners are Phillips head screws, and 5/16″ head bolts. It is extremely important to make sure you have the room and ability to press firmly down on the Phillips head screws in order to remove them, making sure you have the pressure to get them started without stripping the heads out.
If the bolts or screws are extremely stuck. Use some penetrating oil liberally in order to get them turning. It is also important that you clean the top of the sender before working on it or removing it. This way we are keeping dirt and other stuff from getting down into the fuel tank.
With the screws or bolts out, you can pull up on the sender, removing it from the tank.
Testing the Fuel Sender and Tank Ground.

After removing the fuel sender, let’s check it before putting in a new one. Connect a meter to the two wires on the sender. With the meter in the continuity feature, slowly run the float from the bottom towards the top.
We should see a resistance change and a steady climb. If the resistance doesn’t move or is maxed out on a certain number. The sender has failed and is no longer operating properly. It is time to install a new one.
Picking a New Sender and Running Out of Fuel
Taking a stick, a tape measure, or something else, we want to measure the distance from the bottom of the fuel tank to the top. Leaving off about one inch from that number, we now know what size of a sender to buy.
Leaving a little space at the bottom allows you to have a little bit of fuel to run off of whenever the gauge reads empty. I wouldn’t advise running the boat down on fumes like you can a car though.
If you run your boat completely empty, there is a good chance that you could suck up dirt, debris, or other sludgy substances from the bottom of the tank. Sending all of that into the engine.
This could cause major running issues and even a costly repair cleaning carburetors or injectors! So I would strongly suggest just filling up whenever you take the boat out!
The fuel sender only goes in a certain way. Pay attention to the hole pattern and you can even take the gasket off and spin it around until the holes line up perfectly! If you noticed which way the wires were facing when you removed the sender, this usually points the direction of how the sender needs to go.
Tighten it down and wire it back up to the fuel gauge and the boat’s battery ground. Turn the key on and see how much fuel is in your tank with your working fuel gauge!
Check Us Out!
We hope that this has been insightful and allowed you to understand a little bit more about how a fuel gauge works and how to diagnose issues!
If you have more questions or want to learn more about your boat and its different systems. You should consider joining our Boating Academy where we have created HUNDREDS of video courses teaching you basically everything about your boat!
There are also even more helpful videos on our Youtube channel where we create even more boating videos!
You can also save some money by using our coupons when you need to buy stuff from your boat by using any of these coupons here at Partsvu!
And if you would like to support us to continue bringing you great content, please click the link below to Amazon where we get a commission from anything you are already going to buy! Click Here To Amazon!
Here are some other super helpful articles that you might find interesting!